> Configuring Geographic and Time-Based Access Filters
Configuring Geographic and Time-Based Access Filters
The number of Filters that you may add depends on the Service Plan you select.
- To limit access to your Resource depending on a user’s country, add a Geographic Filter.
- To limit access to your Resource depending on the login time, add a Time Filter.
- Then assign the Filter to the Resource that you wish to apply it to.
1. How to Add a Geographic Filter
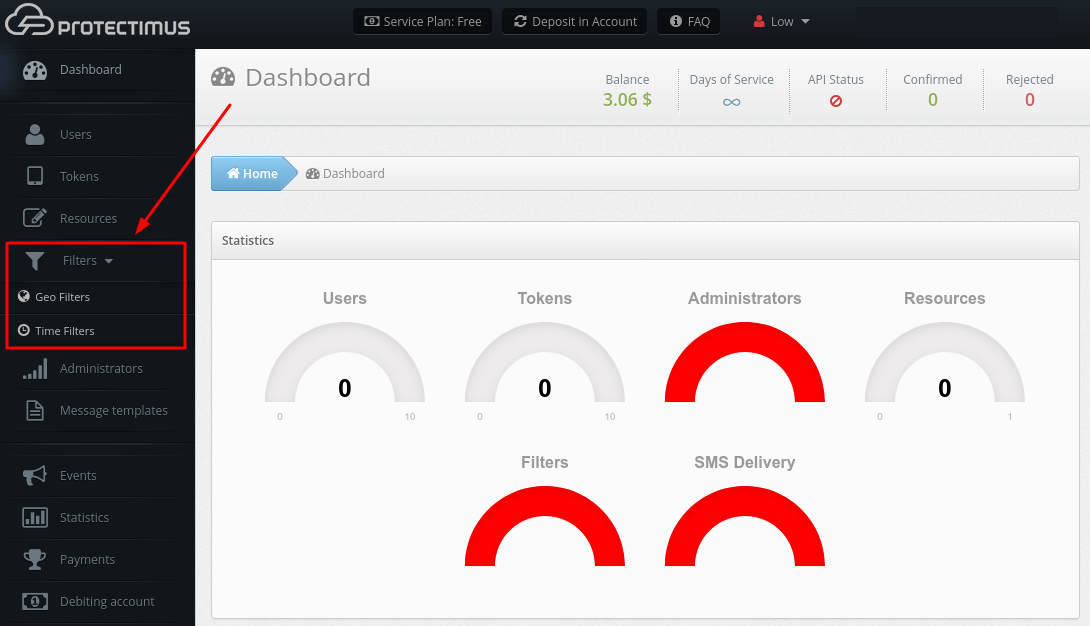
This feature allows you to open access to the Resource only from certain countries. If someone tries to log in from a forbidden country, then they will not have access to the account, if from allowed, then the system will ask for a one-time password. You can also deny access only from selected countries.- Log into your account in Protectimus SAAS Service or On-Premise Platform and go to Filters – Geo Filters.
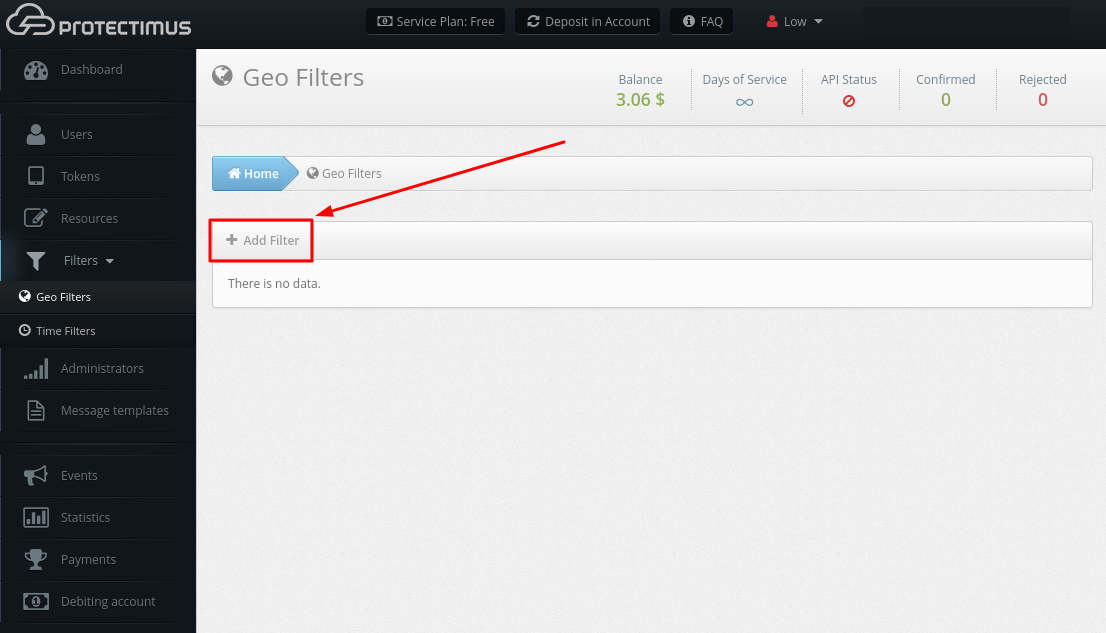
- Click the Add Filter button.
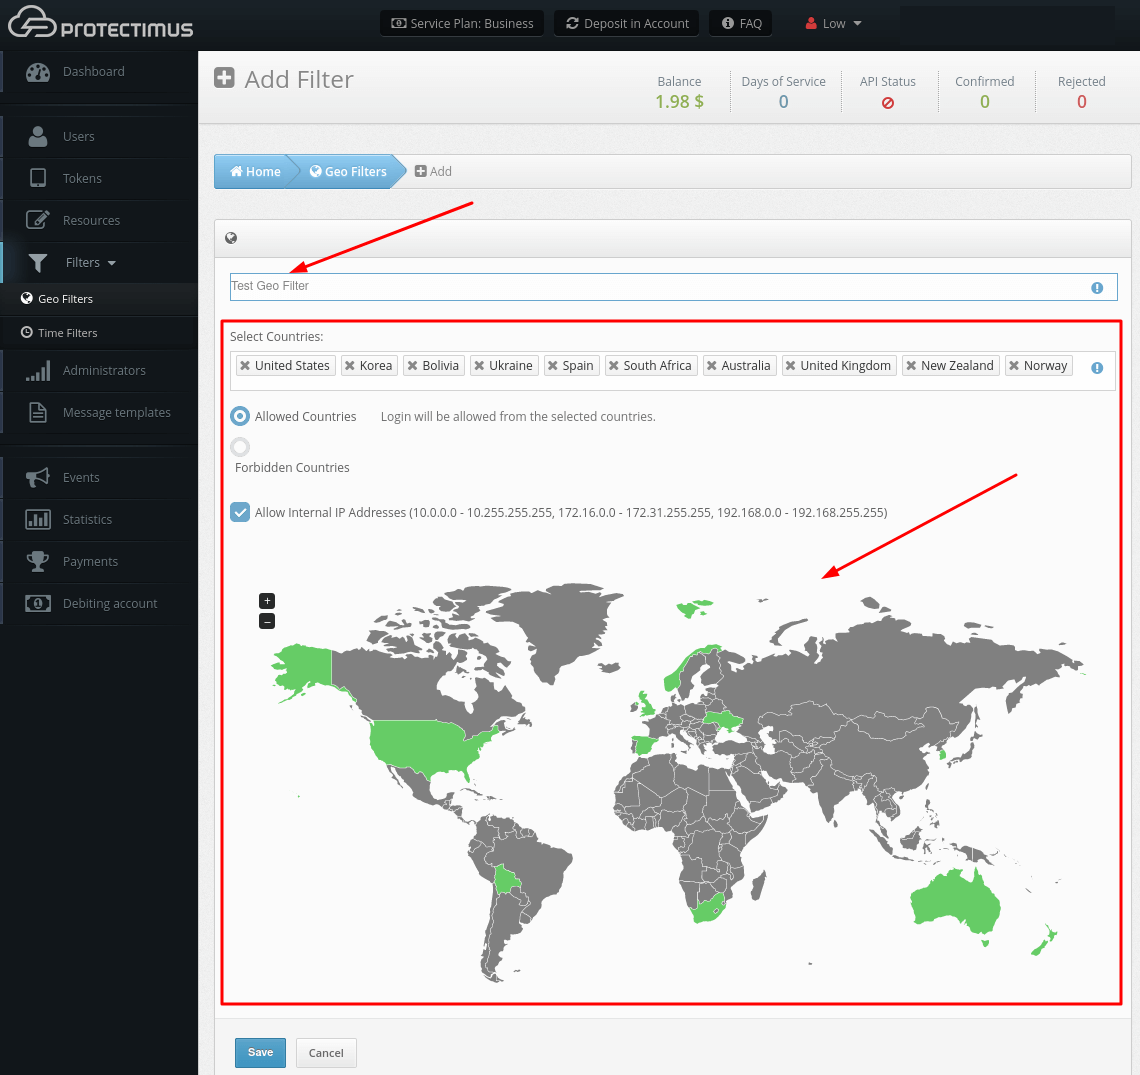
- Enter the Filter Name and select the countries where access to your Resource will be allowed or denied. Then click Save.
- Assign the created Geo Filter to the Resource. Read how to do this here.
2. How to Add a Time Filter
This feature allows granting access to a Resource only at a certain time; for example, only during business hours. This approach significantly increases the level of protection against unauthorized account access. It’s perfect for corporate environments: even if a User leaves their Token at work, nobody can access the User’s account in their off-hours.- Log into your account in Protectimus SAAS Service or On-Premise Platform and go to Filters – Time Filters.

- Click the Add Filter button.
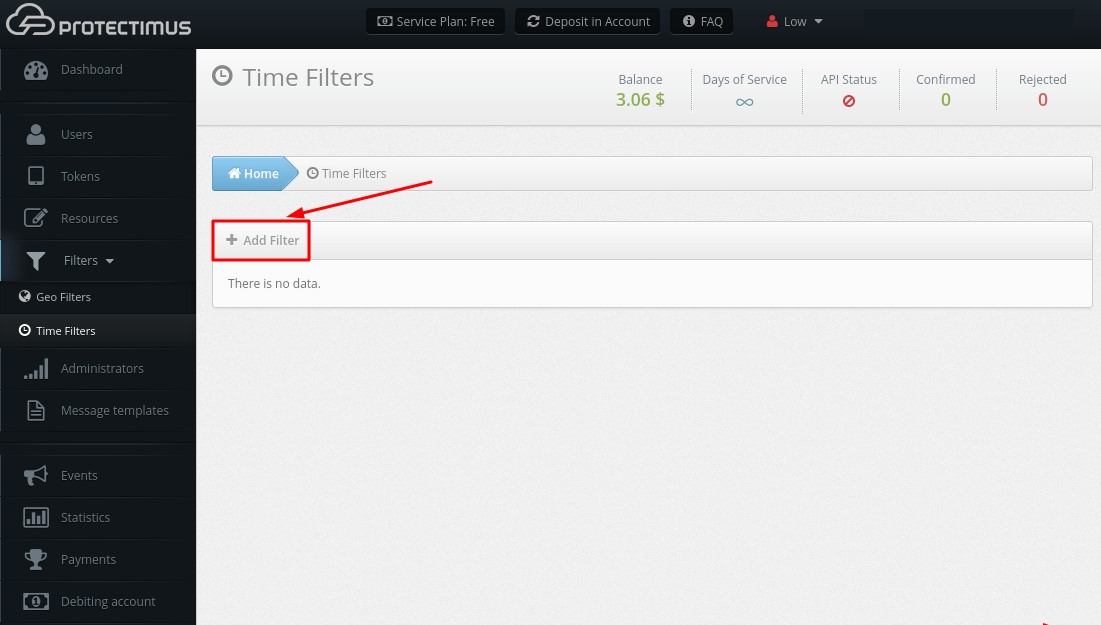
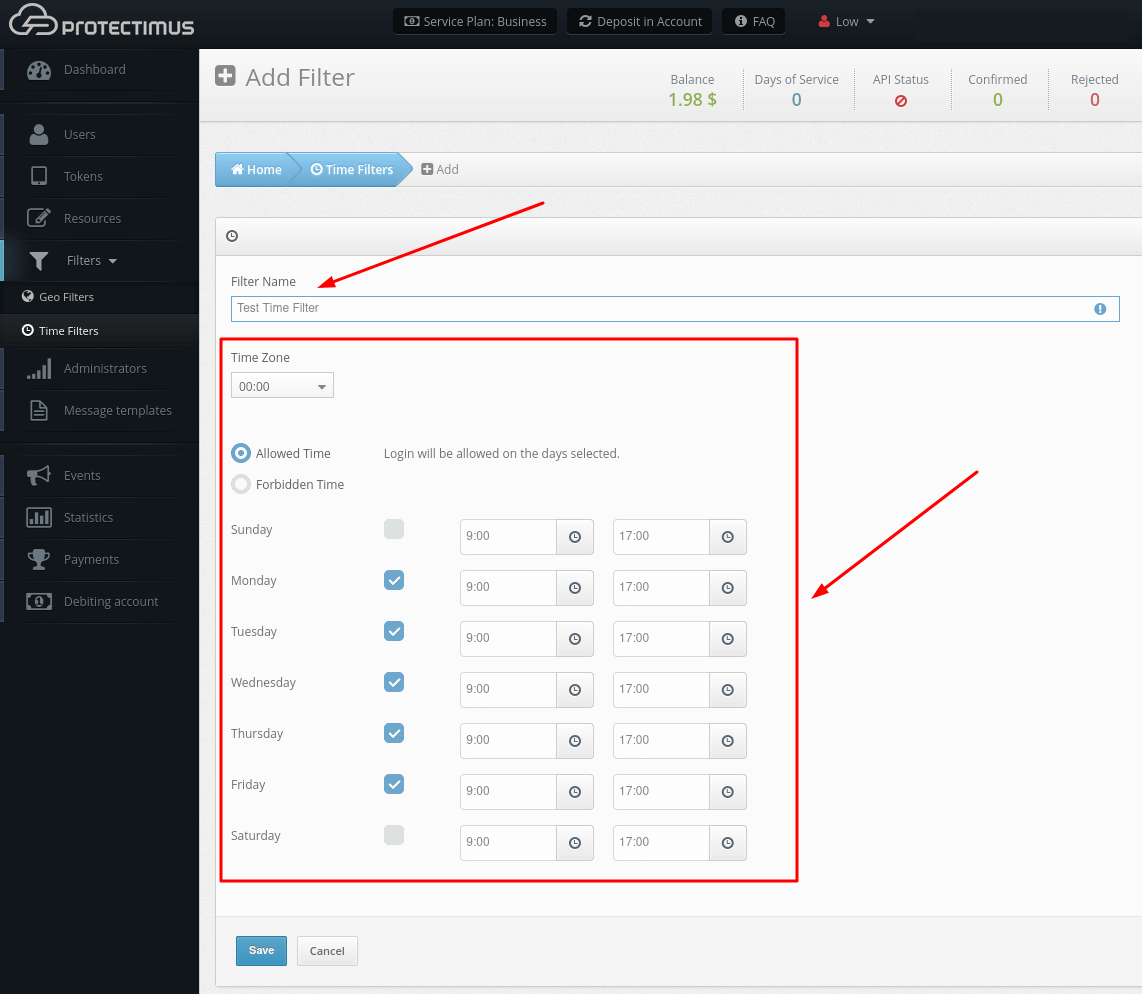
- Enter the Filter Name, specify the time zone, mark the days of the week and specify the time at which access to your Resource will be allowed or denied. After that, click Save.
- Assign the created Time Filter to the Resource. Read how to do this here.
3. How to Assign Filters to a Resource
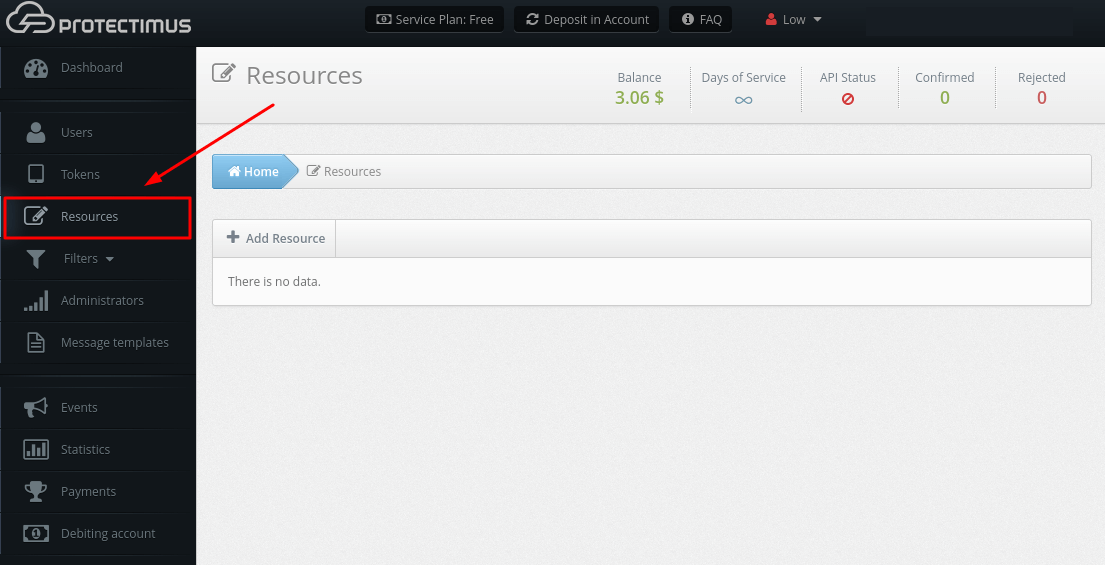
- Go to the Resources page.
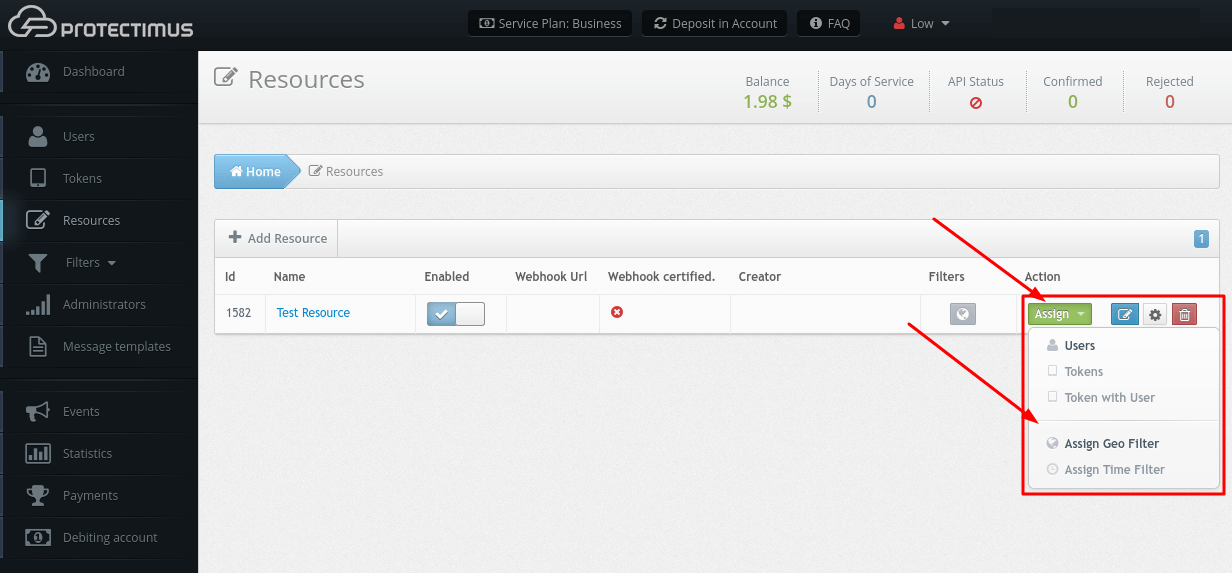
- Find the Resource you need, click Assign, then select a Geo Filter or a Time Filter, depending on which filter you want to assign.
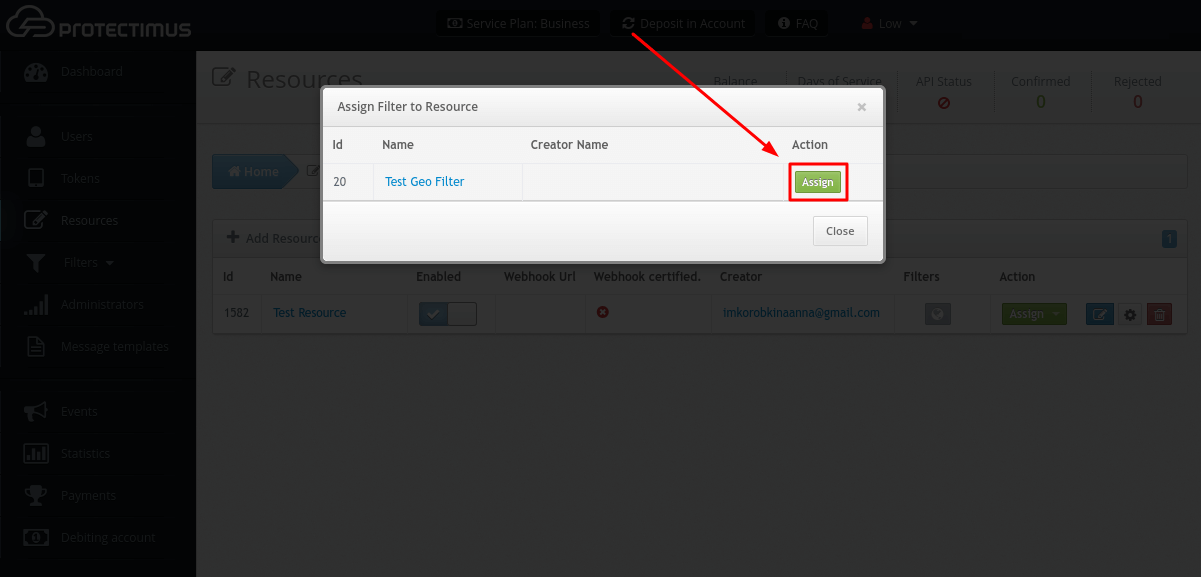
- After that, select the desired filter from the list that appears, and click Assign.
Last updated on 2025-03-12
