Authentication & Verification
Classic 2FA / MFA
MFA for AD, LDAP, Databases
Wi-Fi Authentication
Electronic Visit Verification
Popular Integrations
Popular Integrations
Programmable hardware TOTP token in a card format that fits any authentication system
Classic hardware TOTP token with SHA-1 algorithm support
Programmable hardware TOTP token in a key fob format that fits any authentication system
Classic hardware TOTP token with SHA-256 algorithm support
Programmable hardware TOTP token in a card format that fits any authentication system
Classic hardware TOTP token with SHA-1 algorithm support
Programmable hardware TOTP token in a key fob format that fits any authentication system
Classic hardware TOTP token with SHA-256 algorithm support
A free 2FA authenticator app with cloud backup, easy token transfer to a new phone, PIN and biometric authentication protection
Free OTP delivery with chatbots in messaging apps
Delivery of one-time passwords via SMS messages
Free delivery of one-time passwords via email
Free one-time passwords delivery via push notifications
Get Started
Classic 2FA / MFA
API Documentation
Software Development Kits
Get Started
Classic 2FA / MFA
API Documentation
Software Development Kits
This guide shows how you can set up Citrix 2FA using the Protectimus two-factor authentication system.
Citrix ADC (NetScaler ADC), Citrix Gateway (NetScaler Gateway), as well as Citrix Virtual Apps and Desktops (XenApp & XenDesktop) can be integrated with Protectimus Two-Factor Authentication System using the RADIUS protocol.
Configuring authentication policies in Citrix allows the transmission of an authentication request over the RADIUS protocol to Protectimus RADIUS Server. Having received the request, the Protectimus RADIUS Server, in its turn, contacts the Protectimus authentication server to verify the one-time password of the user and returns the answer to Citrix using RADIUS.
Below is an example of integration of the Protectimus Cirtix 2FA solution with Citrix Gateway (NetScaler Gateway).
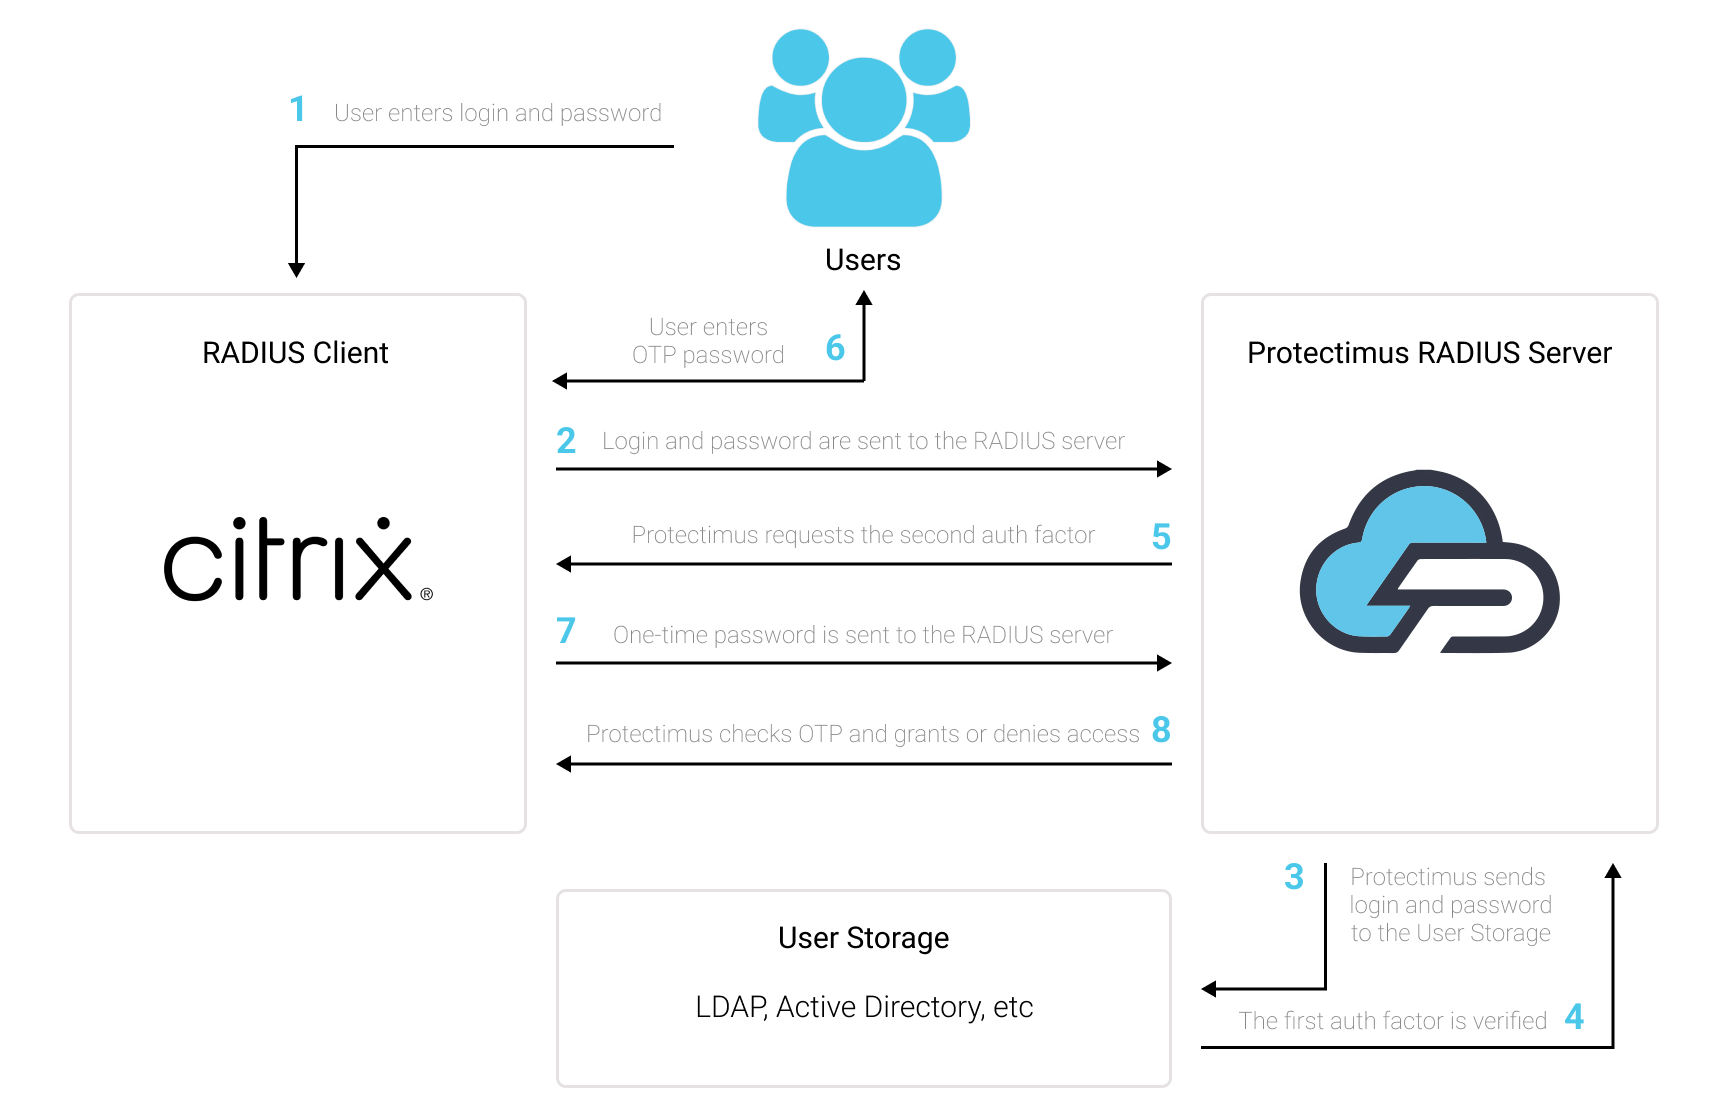
To enable Citrix Gateway two-factor authentication (2FA):
- Get registered with Protectimus SAAS 2FA Service or On-Premise 2FA Platform and configure basic settings.
- Install and configure Protectimus RADIUS Server.
- Configure Citrix authentication policies.
Detailed instructions for installing and configuring the Protestimus RADIUS Server are available in our Protectimus RADIUS Server Installation Guide for Citrix 2FA.
For the first factor, we’ll use the user’s Active Directory domain authentication. To do so, configure the LDAP policy:
PLEASE NOTE! To support the password-change function when first logging in and upon password expiry, use LDAPS on port 636. For this function to work correctly, you must also import an SSL certificate.
CN=Users,DC=protectimus,DC=officeCN=admin,CN=Users,DC=protectimus,DC=office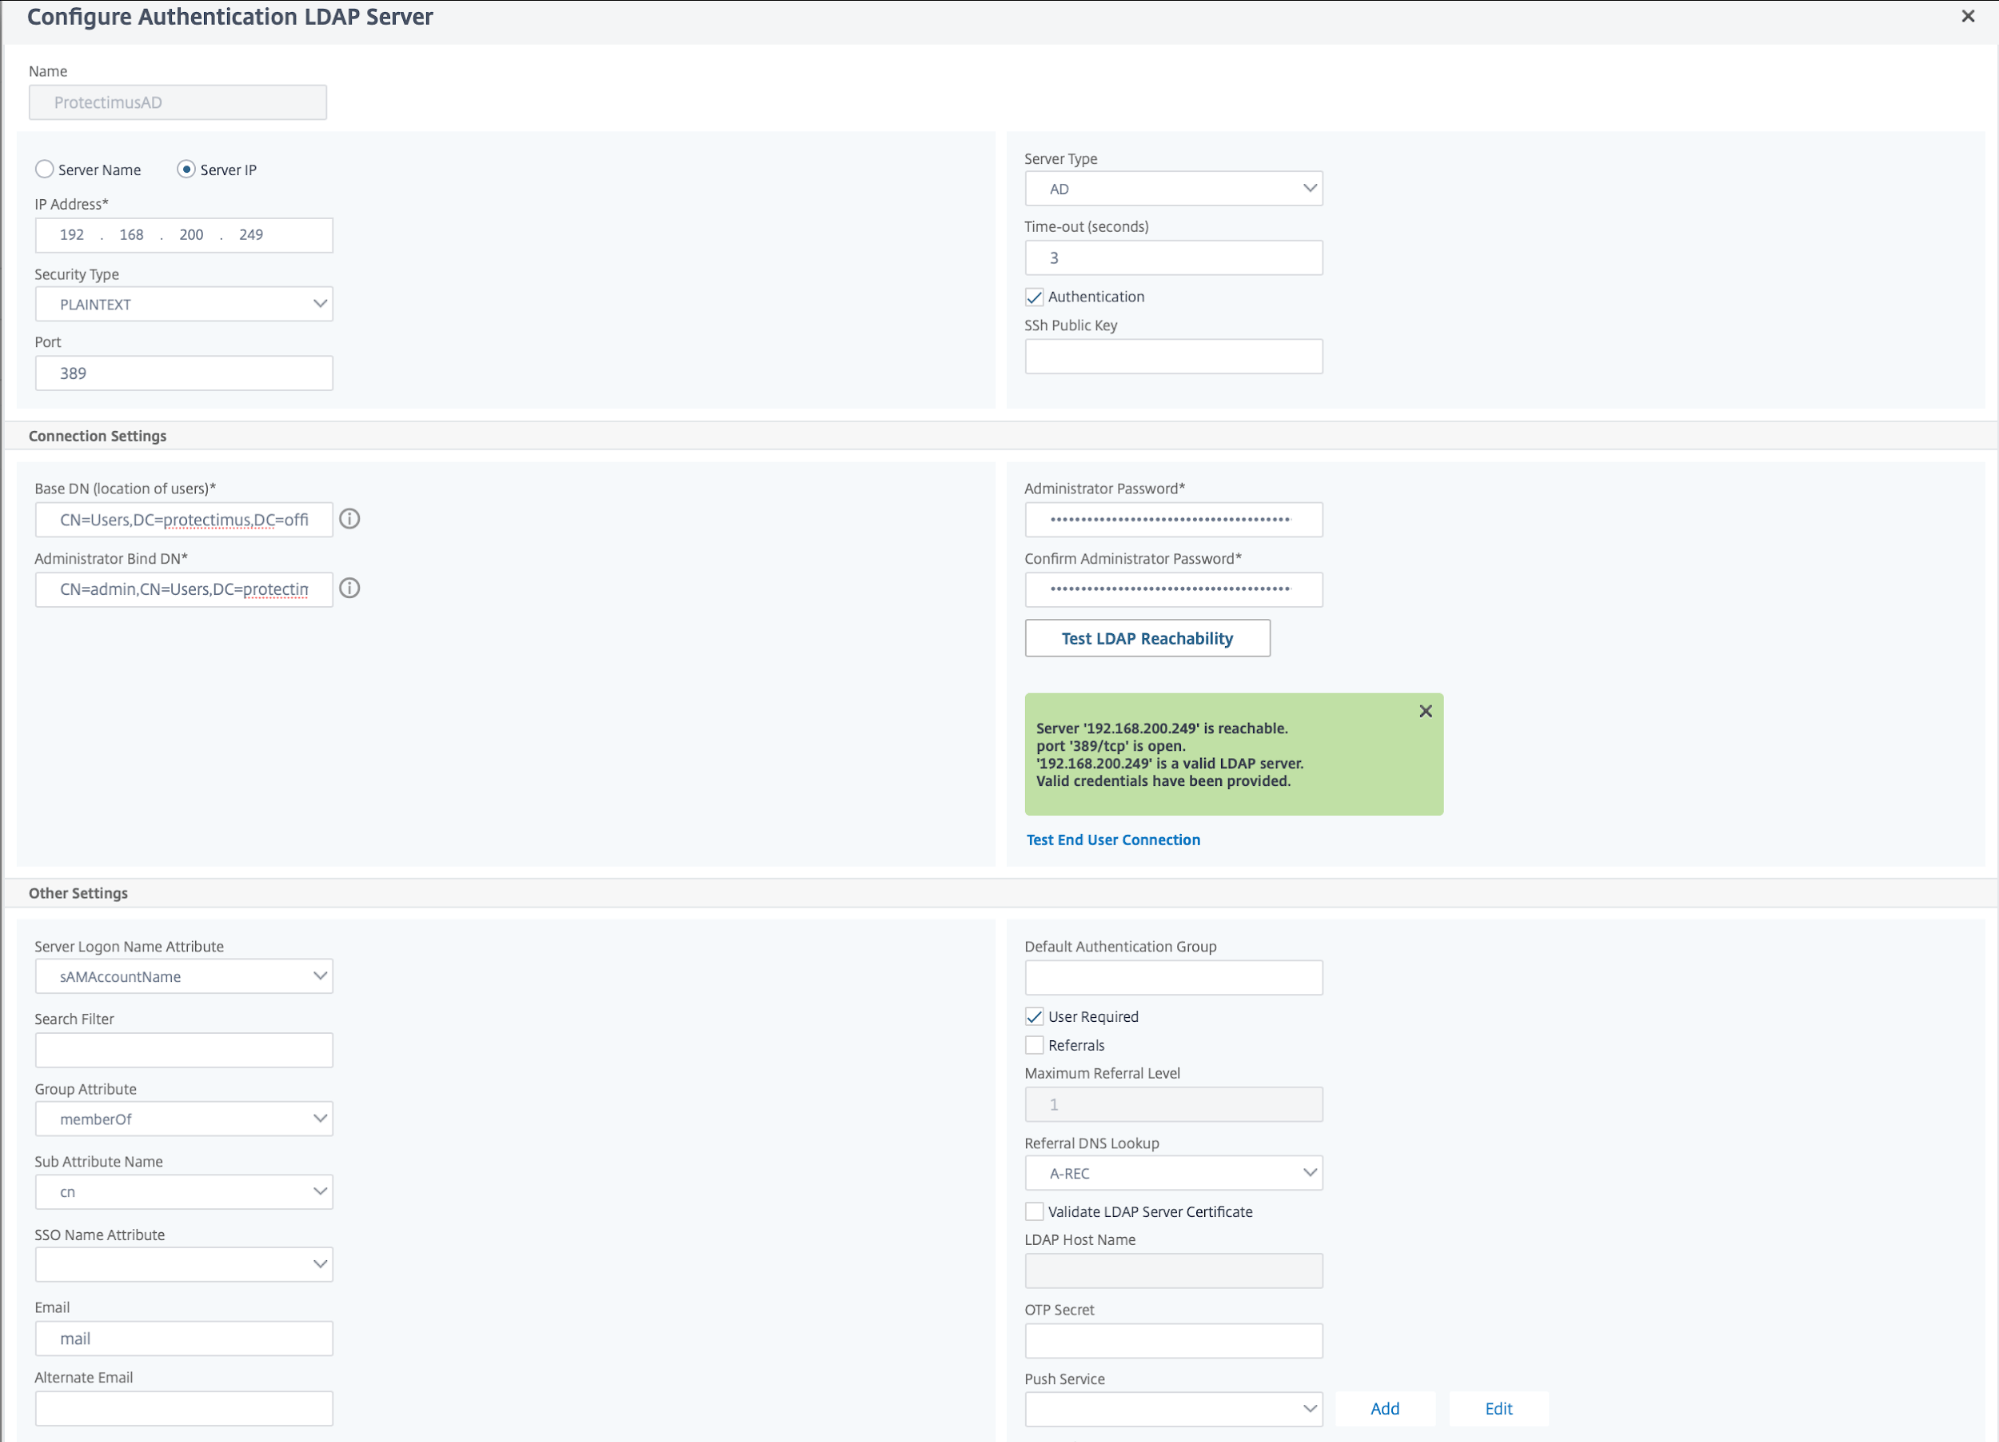


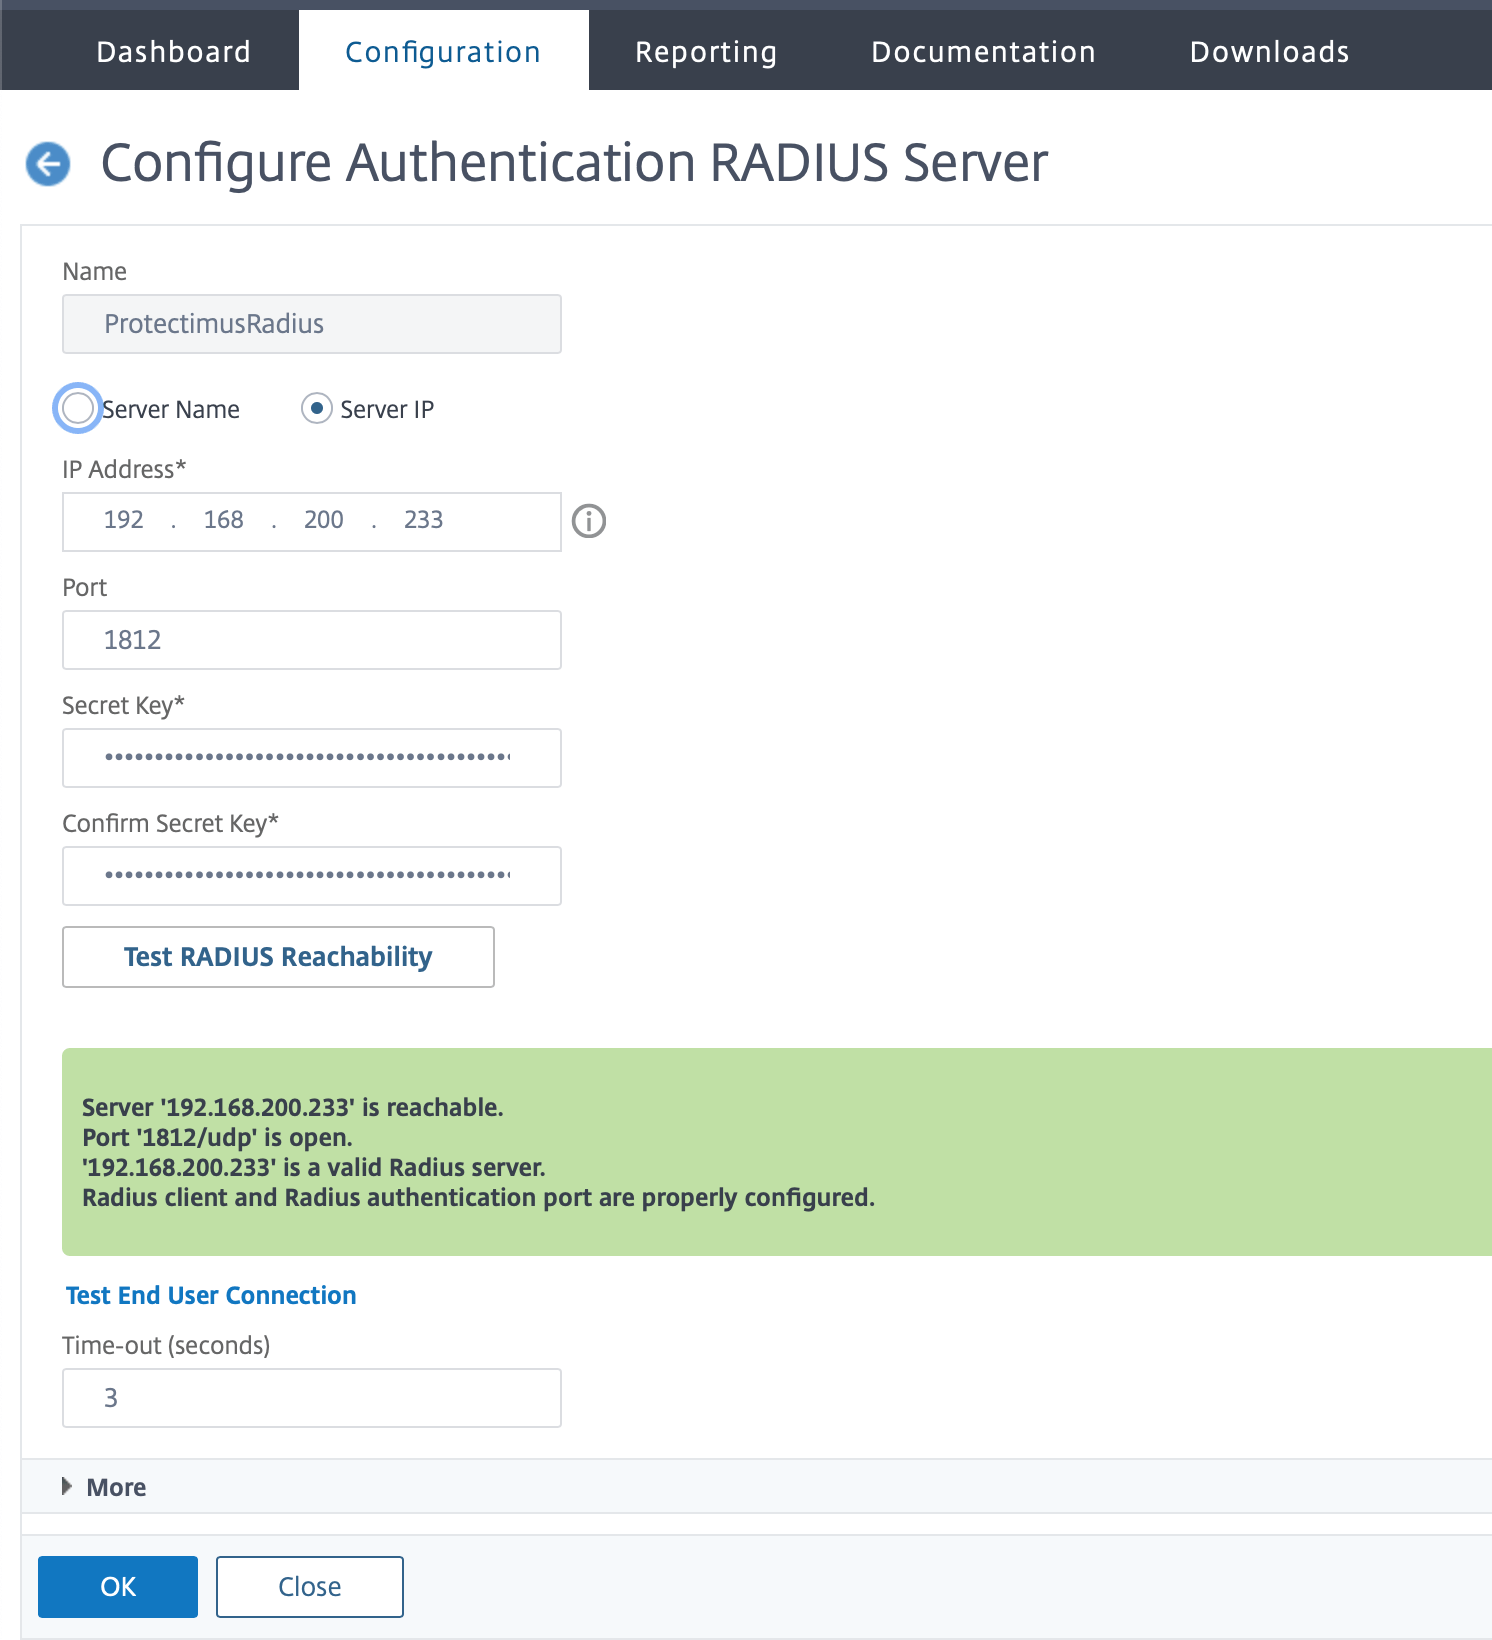

Policy and authentication factor setup is now complete; next, you must specify them on the virtual server.
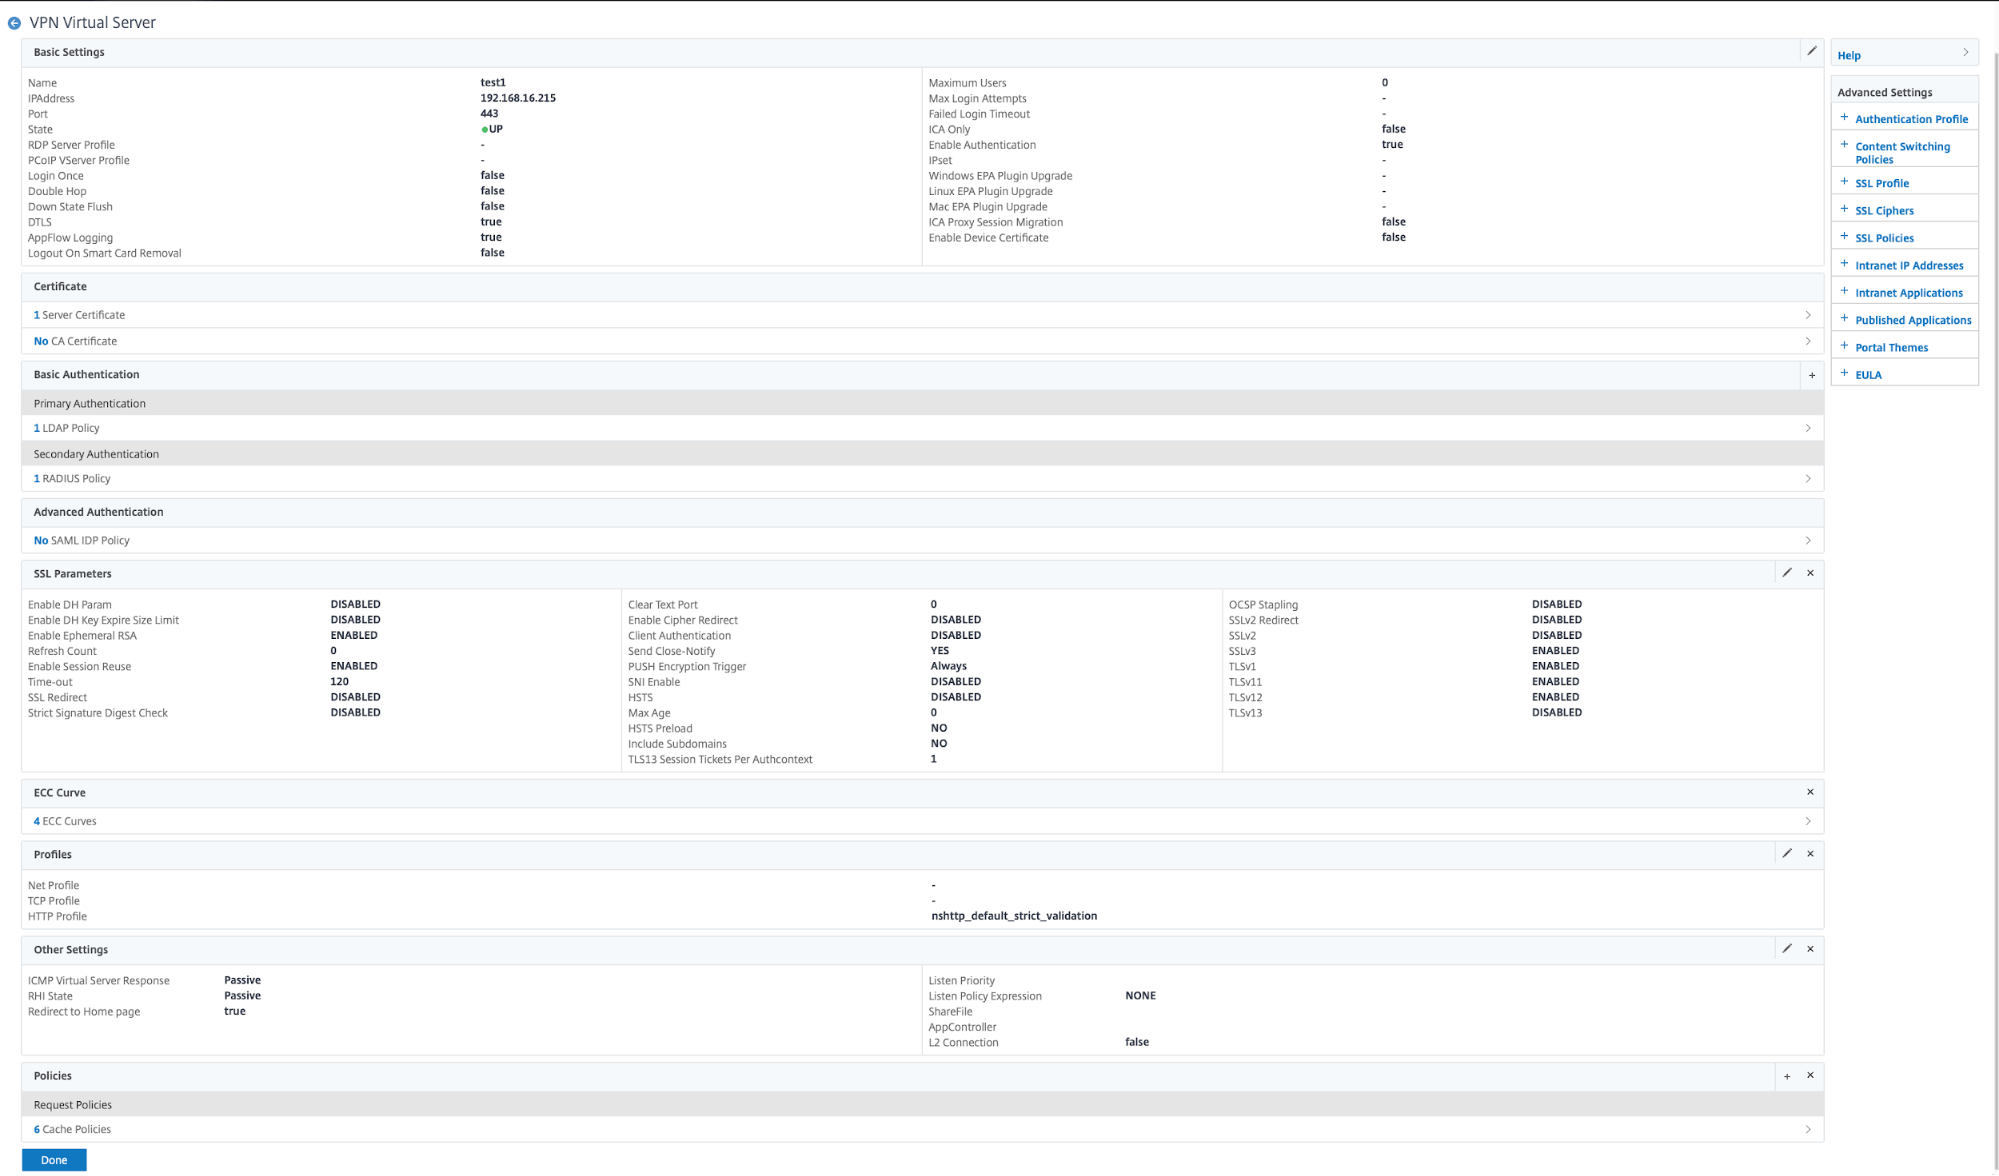
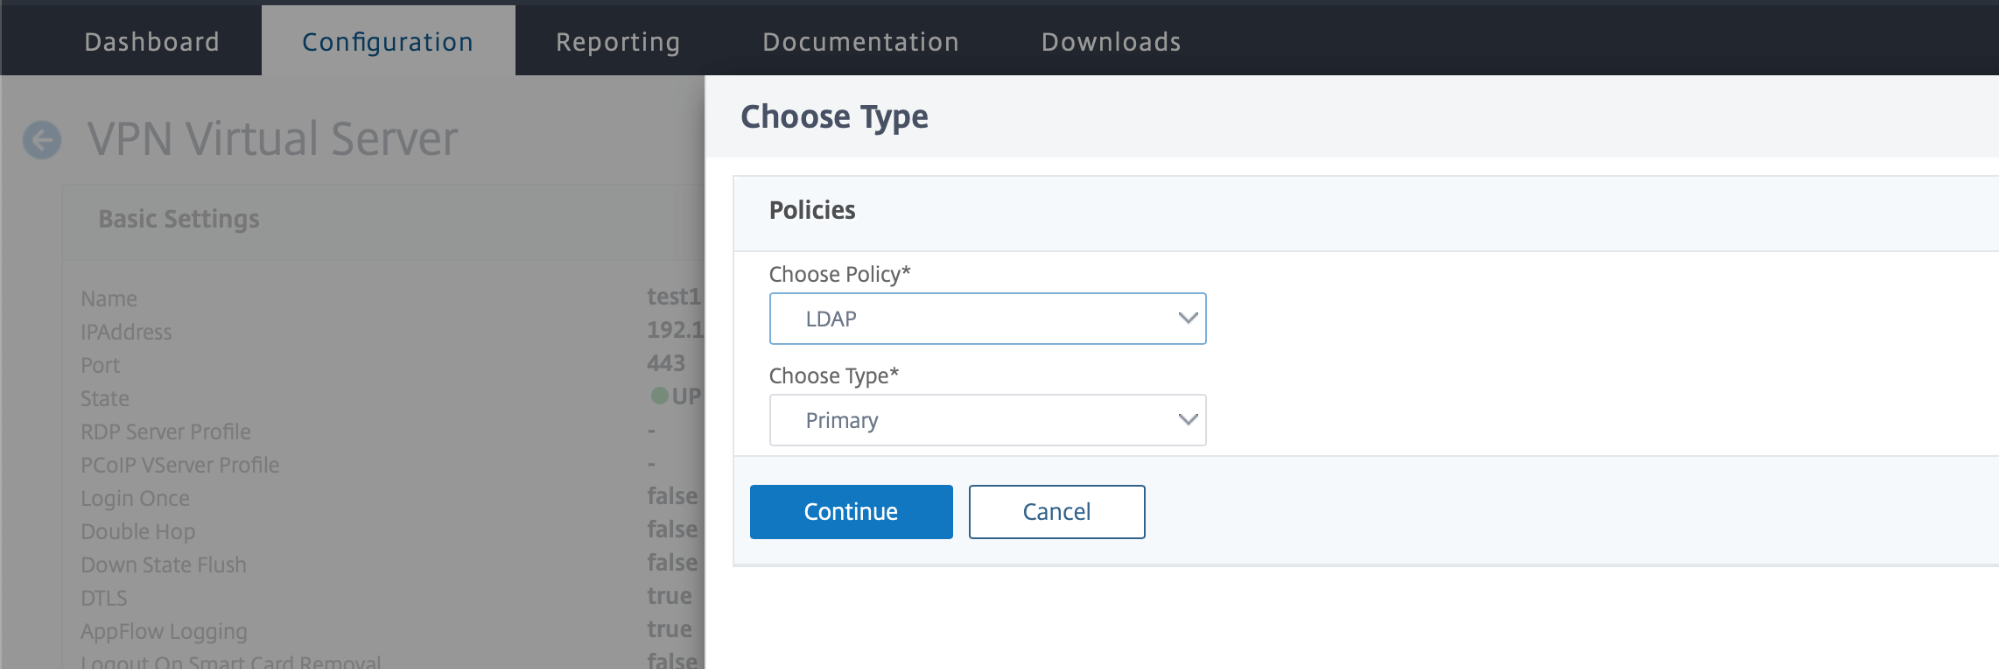
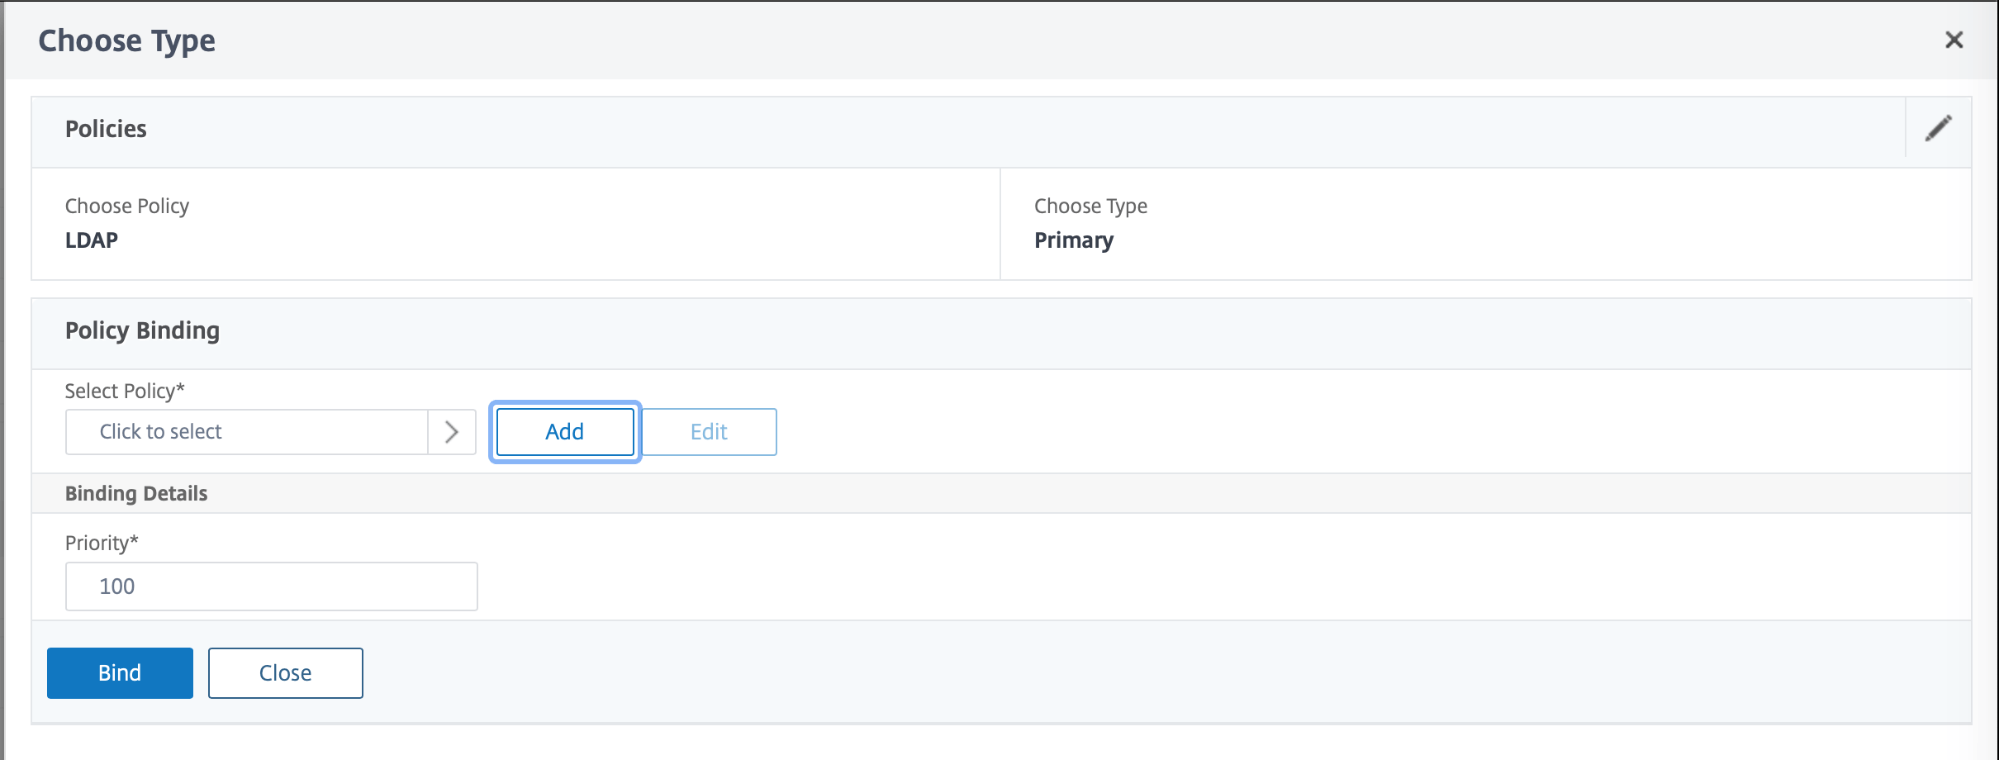
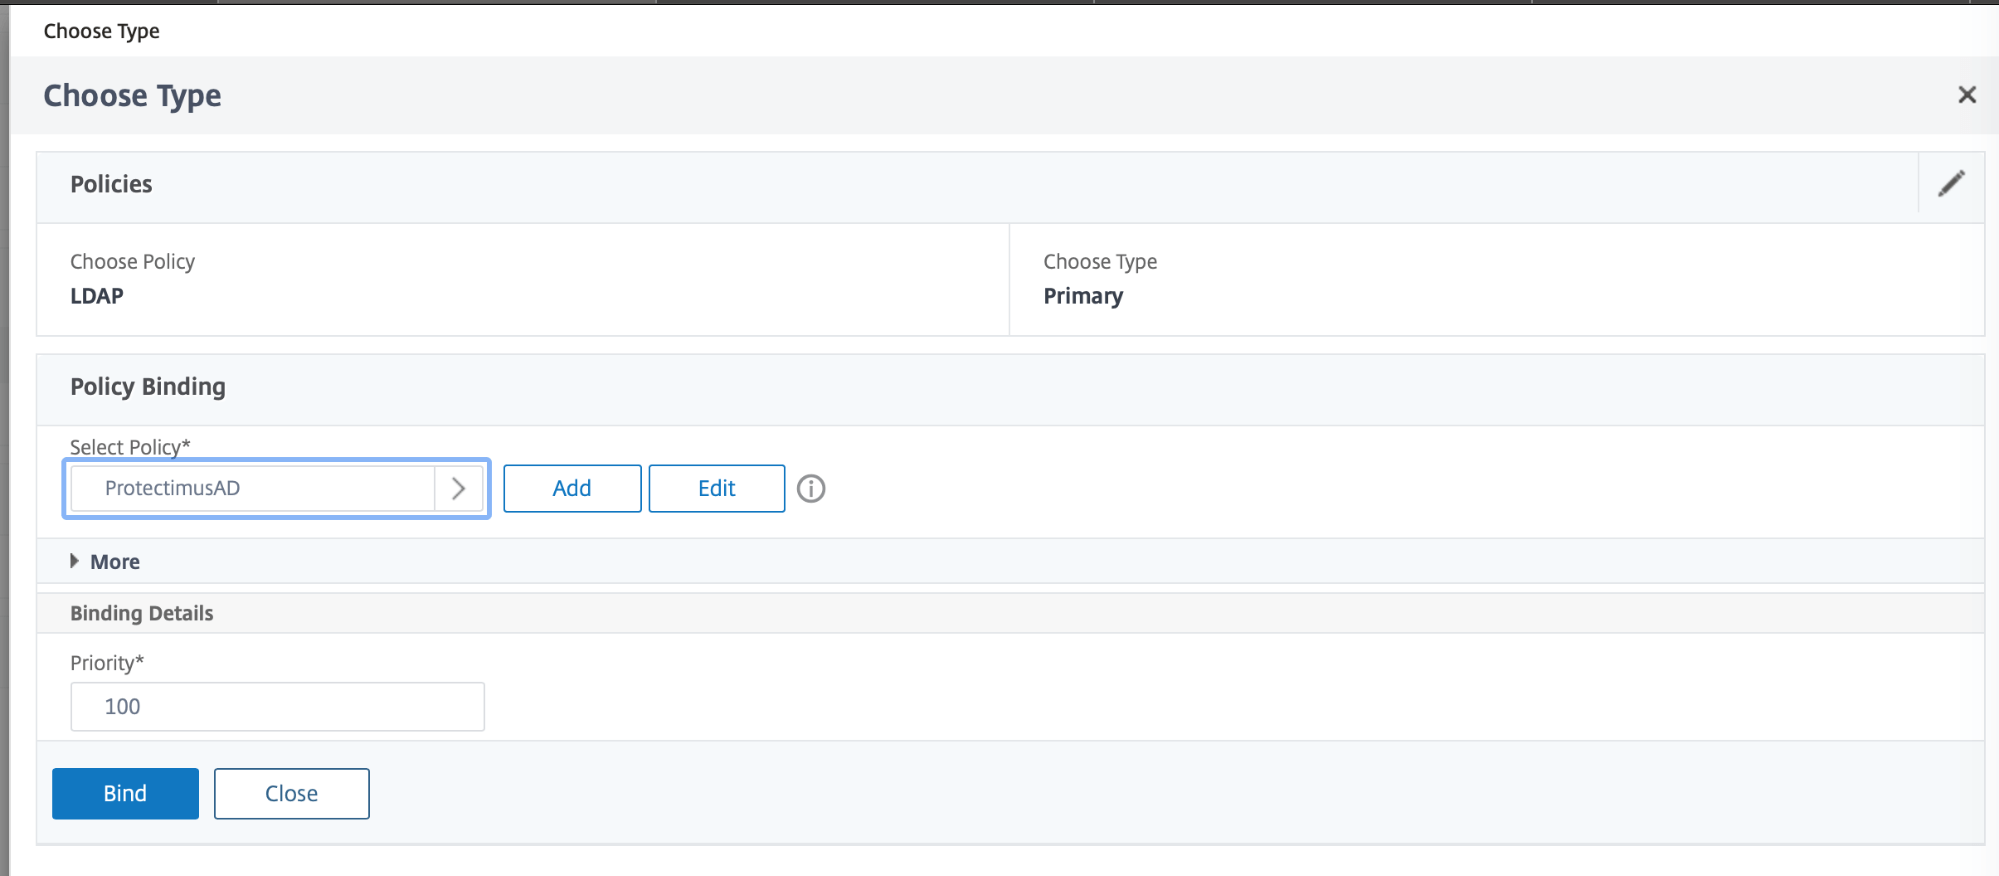
Integration of Citrix 2FA is now complete.
If you have other questions, contact Protectimus customer support service.
Protectimus Ltd
Carrick house, 49 Fitzwilliam Square,
Dublin D02 N578, Ireland
Ireland: +353 19 014 565
USA: +1 786 796 66 64
Protectimus Ltd
Carrick house, 49 Fitzwilliam Square,
Dublin D02 N578, Ireland
Ireland: +353 19 014 565
USA: +1 786 796 66 64


