The Protectimus Windows logon & RDP 2FA solution adds two-factor authentication (2FA / MFA) to protect access to computers running:It protects access to the Windows PCs with 2FA both locally (Windows logon) and via RDP (Remote Desctop Protocol).
- Windows 8;
- Windows 8.1;
- Windows 10;
- Windows 11;
- Windows Server 2012;
- Windows Server 2016;
- Windows Server 2019;
- Windows Server 2022.
The Windows 2FA solution will work even when the computer is offline due to a backup feature. When installing the 2FA component on a Windows computer, the administrator can generate and save a backup code. Then it’s possible to use it instead of a one-time password to log into the user accounts on this computer in offline mode.
You can learn more about the Protectimus two-factor authetication (2FA) solution for Windows and RDP here.
See below for detailed instructions on setting up Windows two-factor authentication with Protectimus.
1. Get Registered and Configure Basic Settings
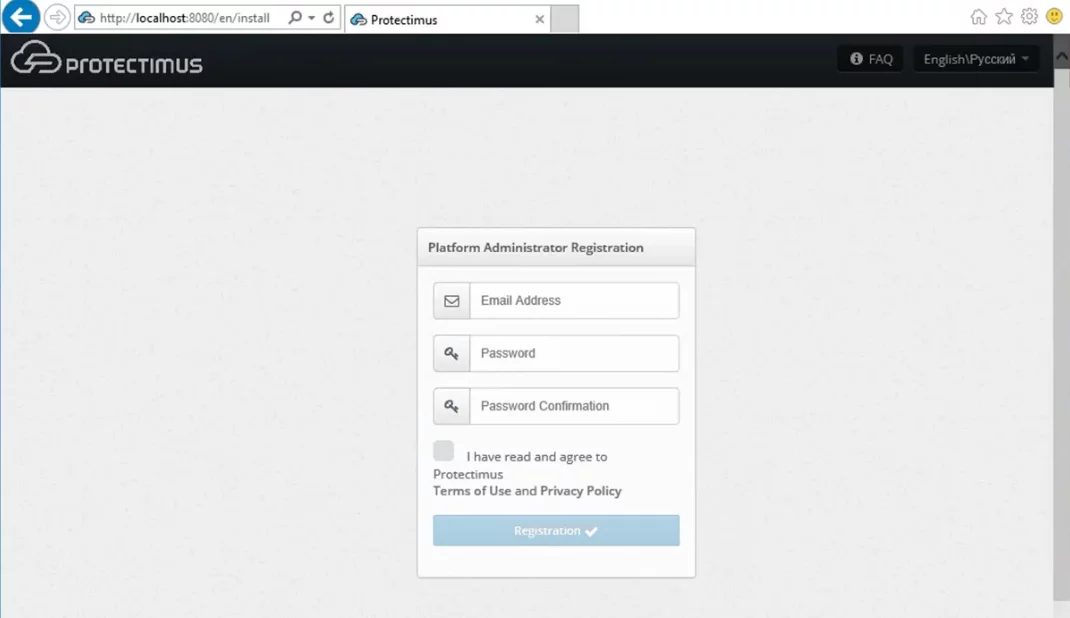
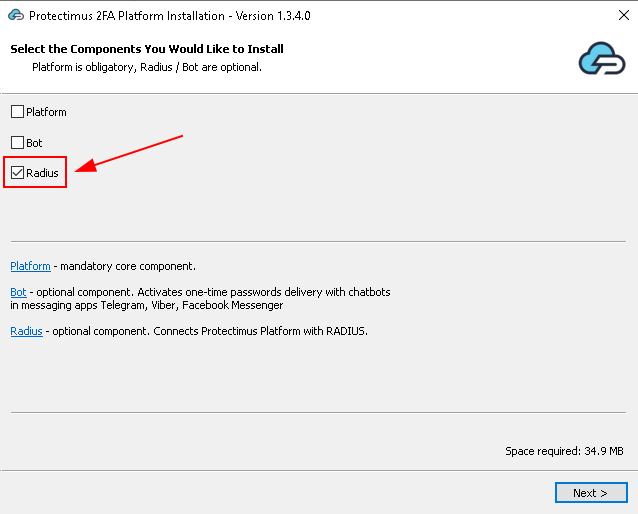
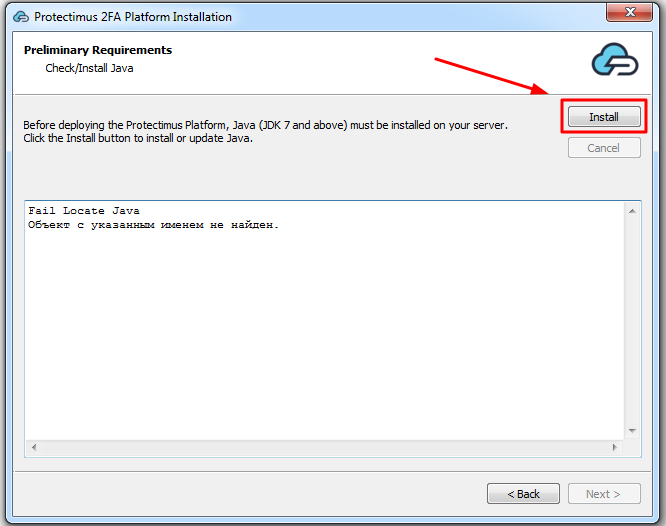
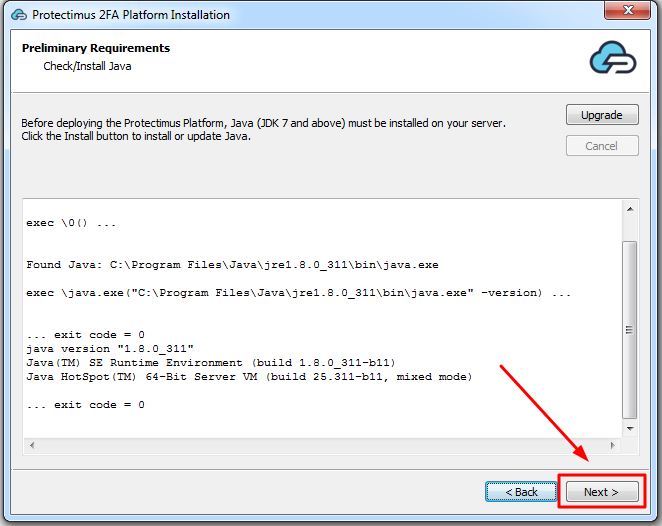
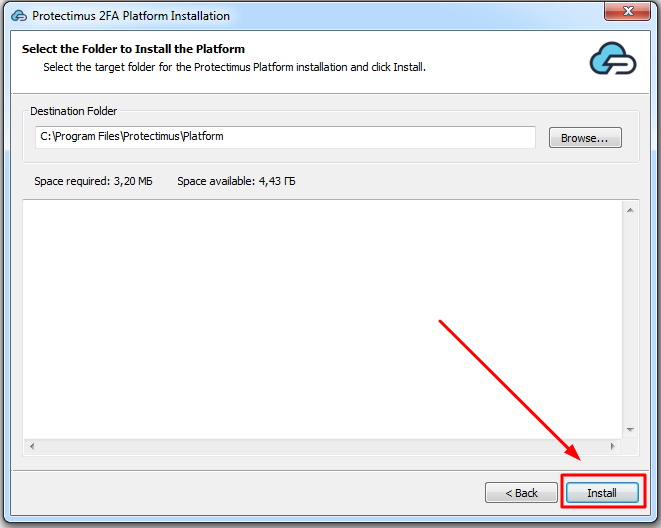
Register with the Protectimus Cloud Service and activate API or install the Protectimus On-Premise Platform.2. Add Resource
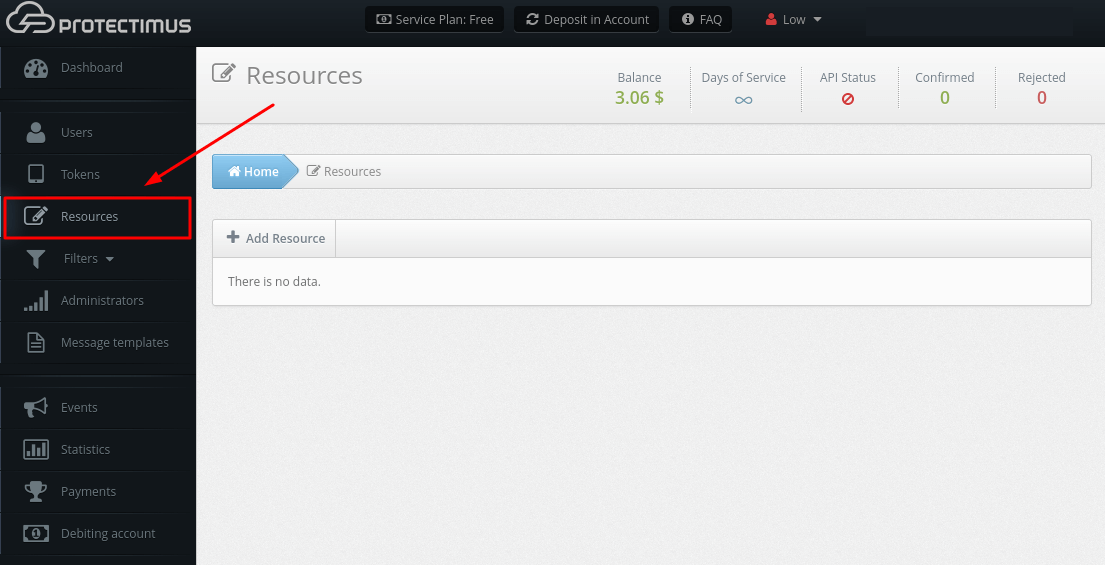
Resources are used to logically group users and tokens and manage them easily.Detailed instructions on adding resources are availabe here.
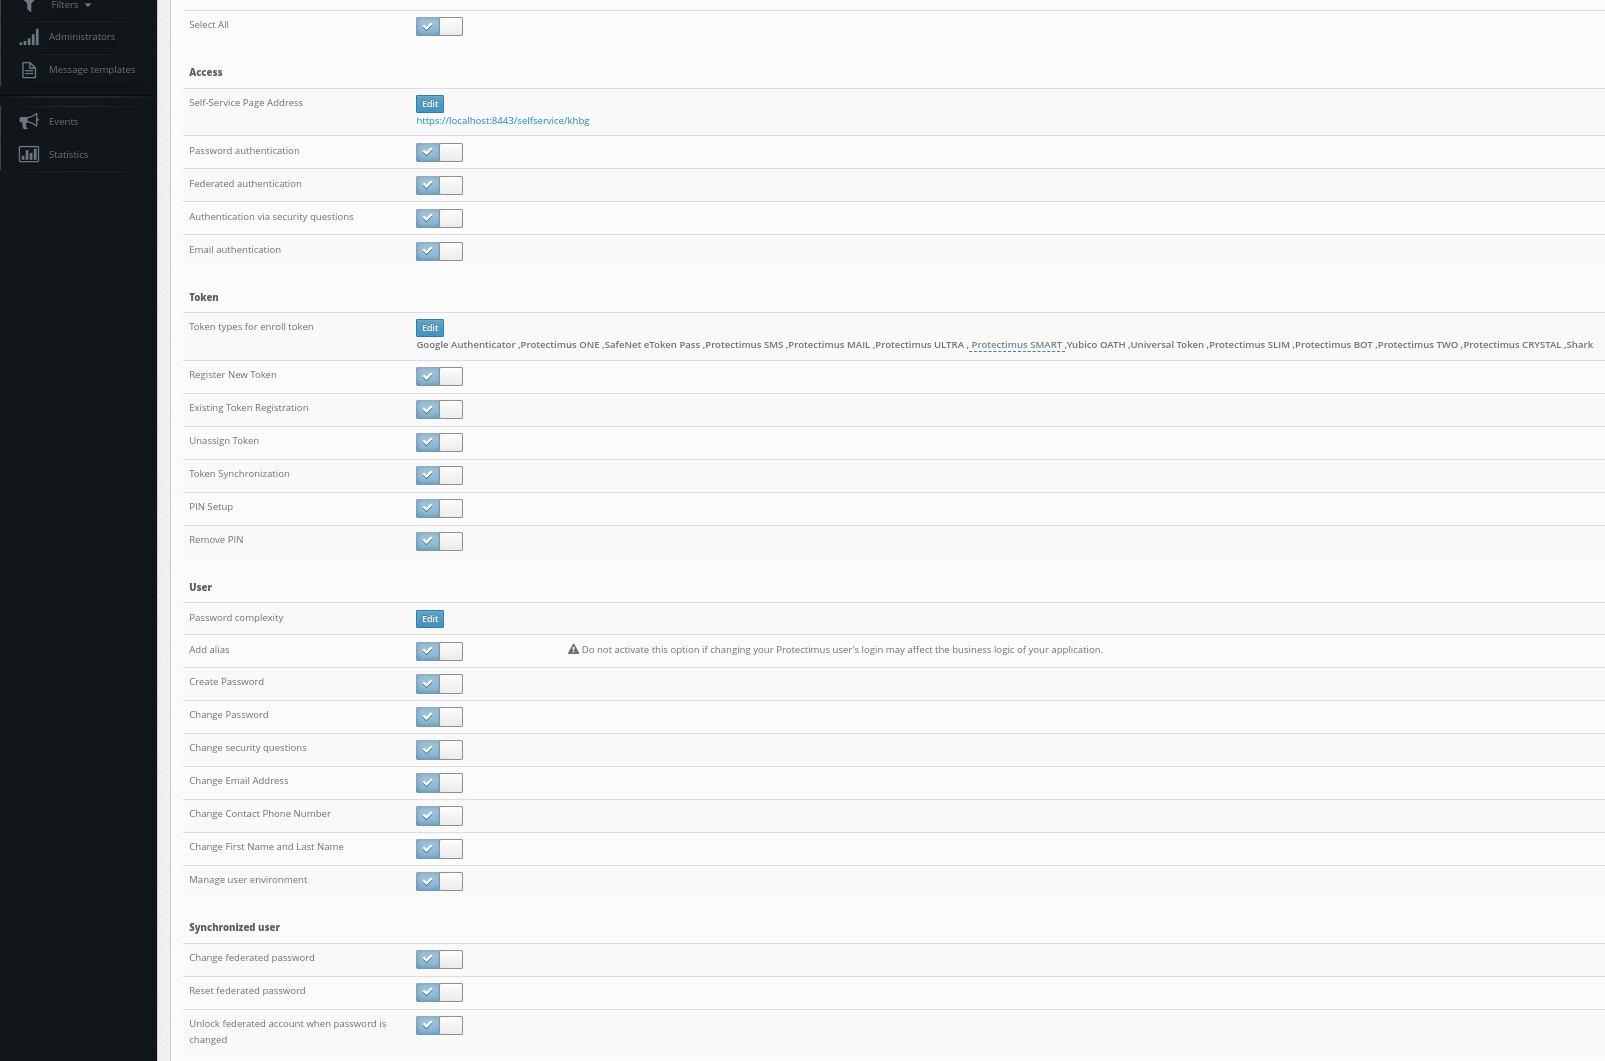
3. Configure Access Policies
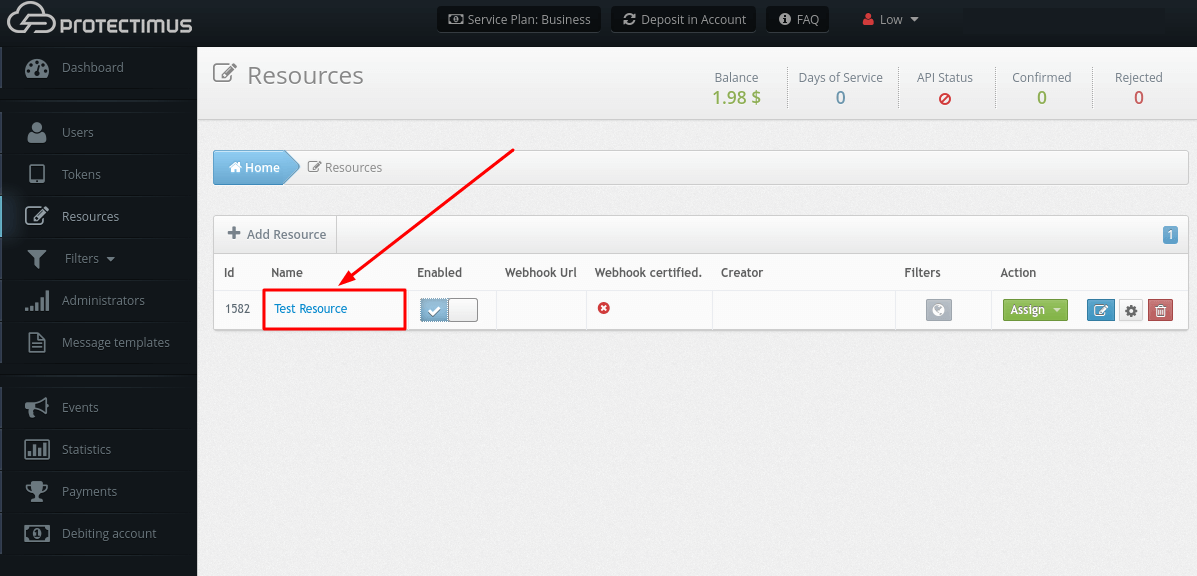
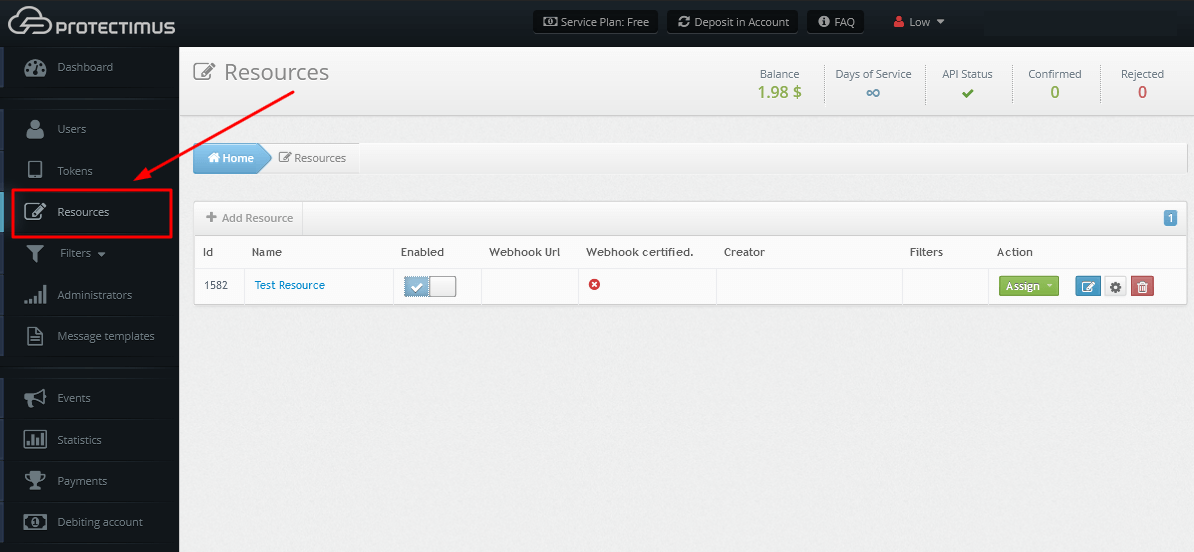
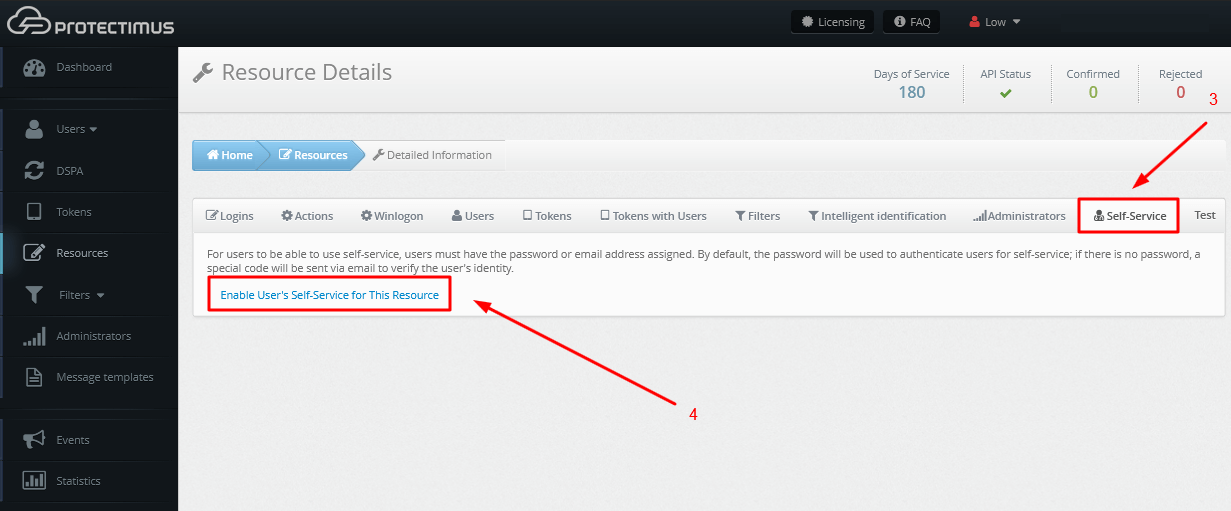
- Go to the Resources page.
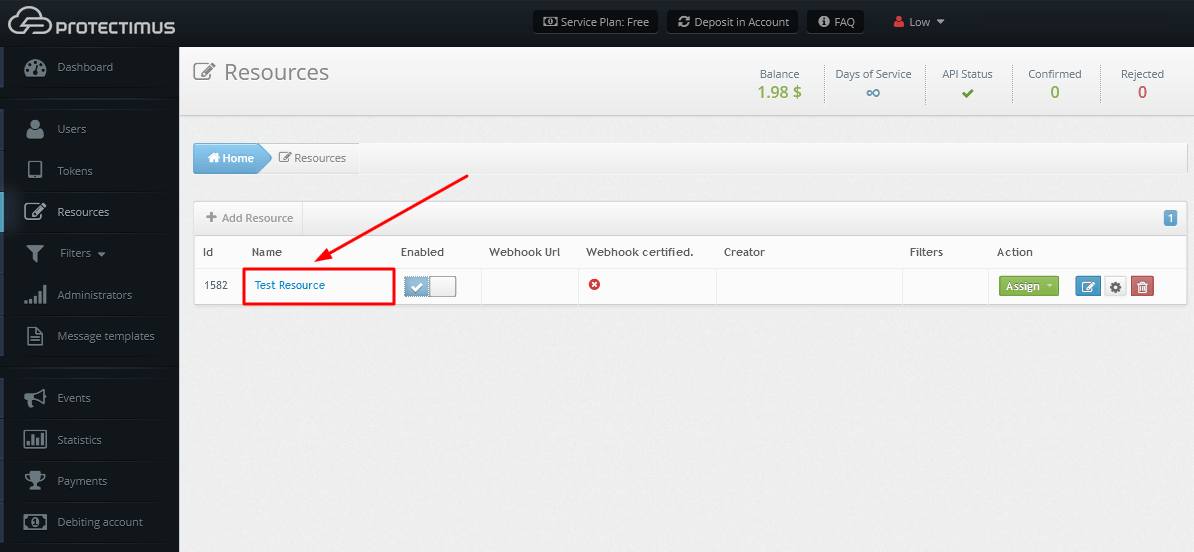
- Click on the name of your resource.
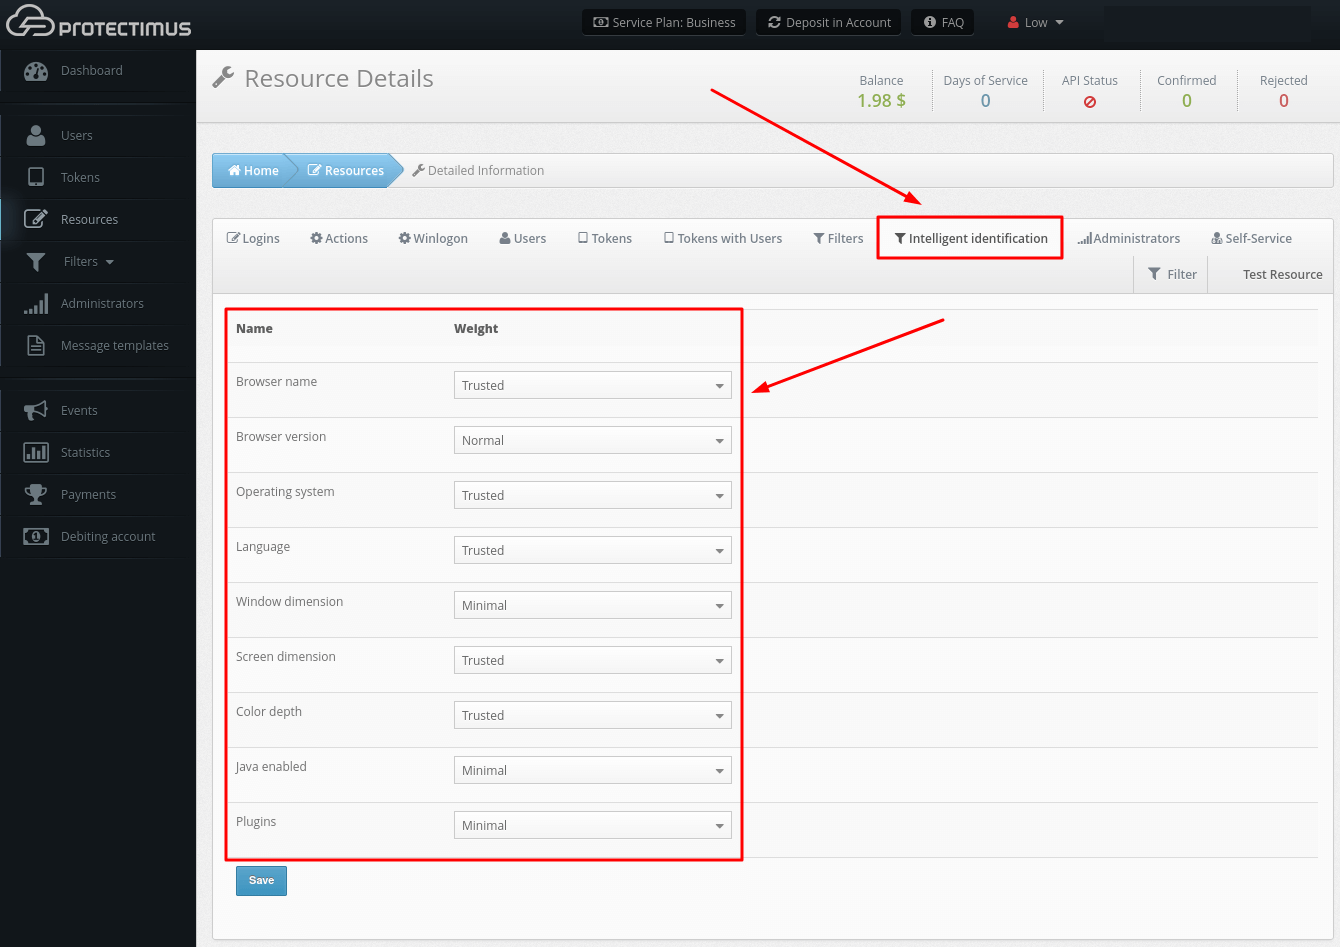
- Open the Winlogon tab.
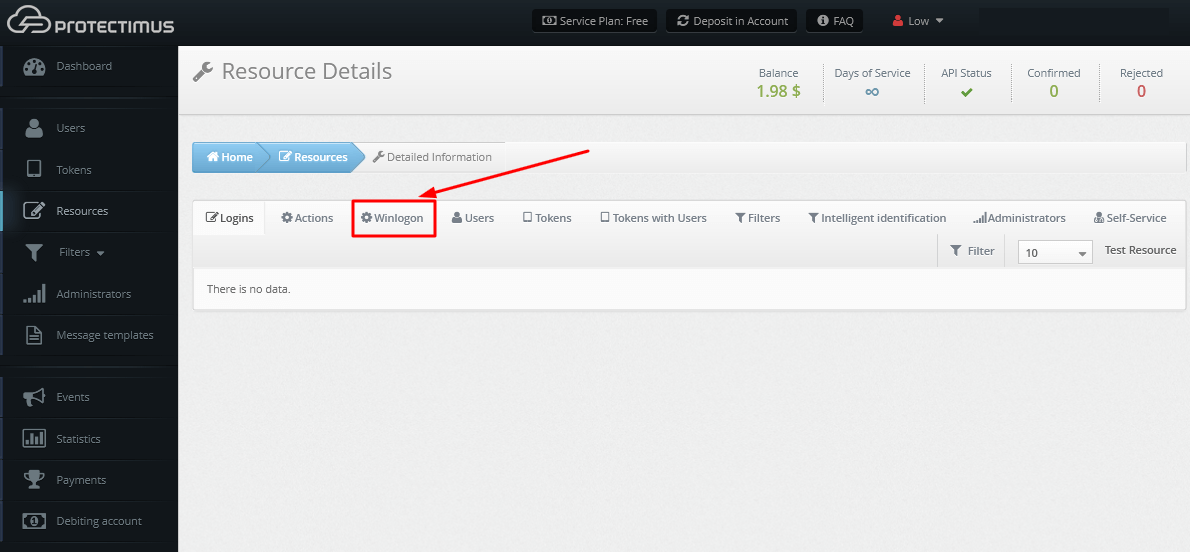
- You will see the list of access policies. Configure the solution according to your requirements.
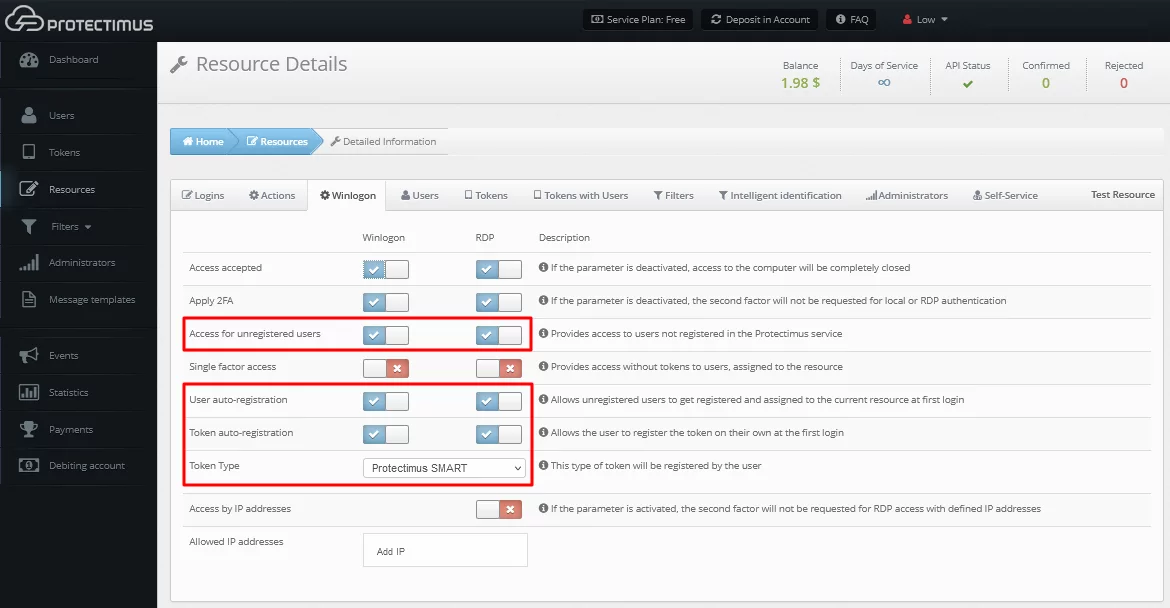
We strongly recommend you enable Automatic Registration of Users and Tokens.
When this feature is activated, the first time your user logs into their account, they will need to enter their usual Windows login, password, and after that, they will have to enroll a token. To enable Automatic Registration of Users and Tokens, tick the next points:- Access for unregistered users;
- User auto-registration;
- Token auto-registration;
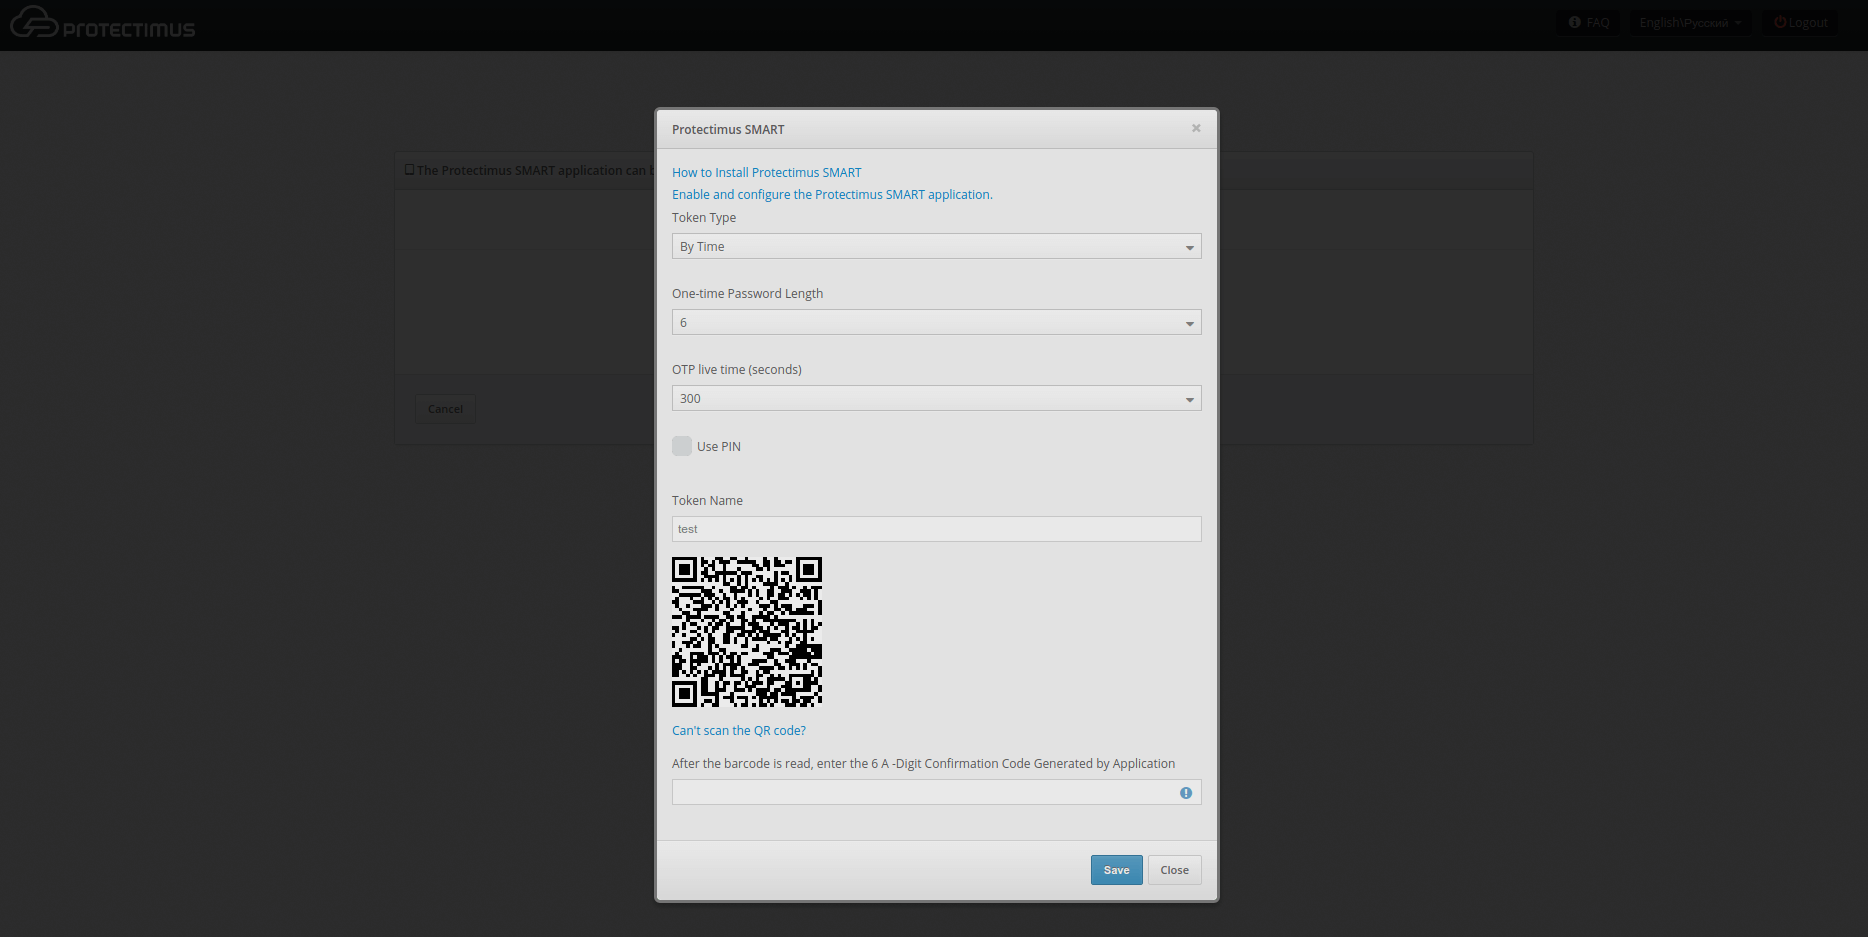
- And choose the type of tokens your users can enroll (Protectimus Mail, Protectimus SMS, or Protectimus SMART OTP).
PLEASE NOTE! You may choose different settings for logging into your Windows account directly or via RDP.
- Access accepted (activated by default)
Opens access to the computer. If this parameter is deactivated, access to the computer locally and/or over RDP will be completely disabled. - Apply 2FA (activated by default)
Activate this parameter to enable two-factor authentication when logging into your Windows account locally and/or over RDP. If this option is deactivated, a one-time password will not be requested. - Access for unregistered users
- This parameter allows you to enable two-factor authentication only for selected users. For example, one computer is used by 3 people – John, Adam, and Michael – but you want a one-time password to be requested only when logging in to Adam’s account. To do this, create only one user (Adam) in the Protectimus service and activate the “Access for unregistered users” parameter so that the other users (John and Michael) log in without two-factor authentication.
- If this parameter is deactivated, the auto-registration of users and tokens is impossible.
- If this parameter is deactivated, only users registered in the Protectimus service and assigned to your resource will be able to login to their accounts.
- Single Factor Access
If this parameter is enabled, users without tokens assigned to the current resource can log in to their Windows accounts without one-time passwords. - User auto-registration
If this parameter is enabled, the first time the users log into their accounts, they will be automatically registered in the Protectimus service and will be assigned to the current resource. - Token auto-registration
If this parameter is enabled, the first time the users log into their accounts, they will need to enroll a token. The type of token that will be available to the users should be selected in the “Token Type” field. - Token Type
In this field, you must select the type of token that will be available to the users during token auto-registration. - Access by IP addresses
If you enable this option and add the list of allowed IP addresses below, then when logging in from trusted IP addresses, users will not be prompted for the one-time passwords. - Allowed IP addresses
If you have activated access by IP addresses, add a list of trusted IP addresses when entering from which a one-time password will not be requested.
PLEASE NOTE!
To use hardware OTP tokens or enable OTP delivery via chatbots in messaging apps:
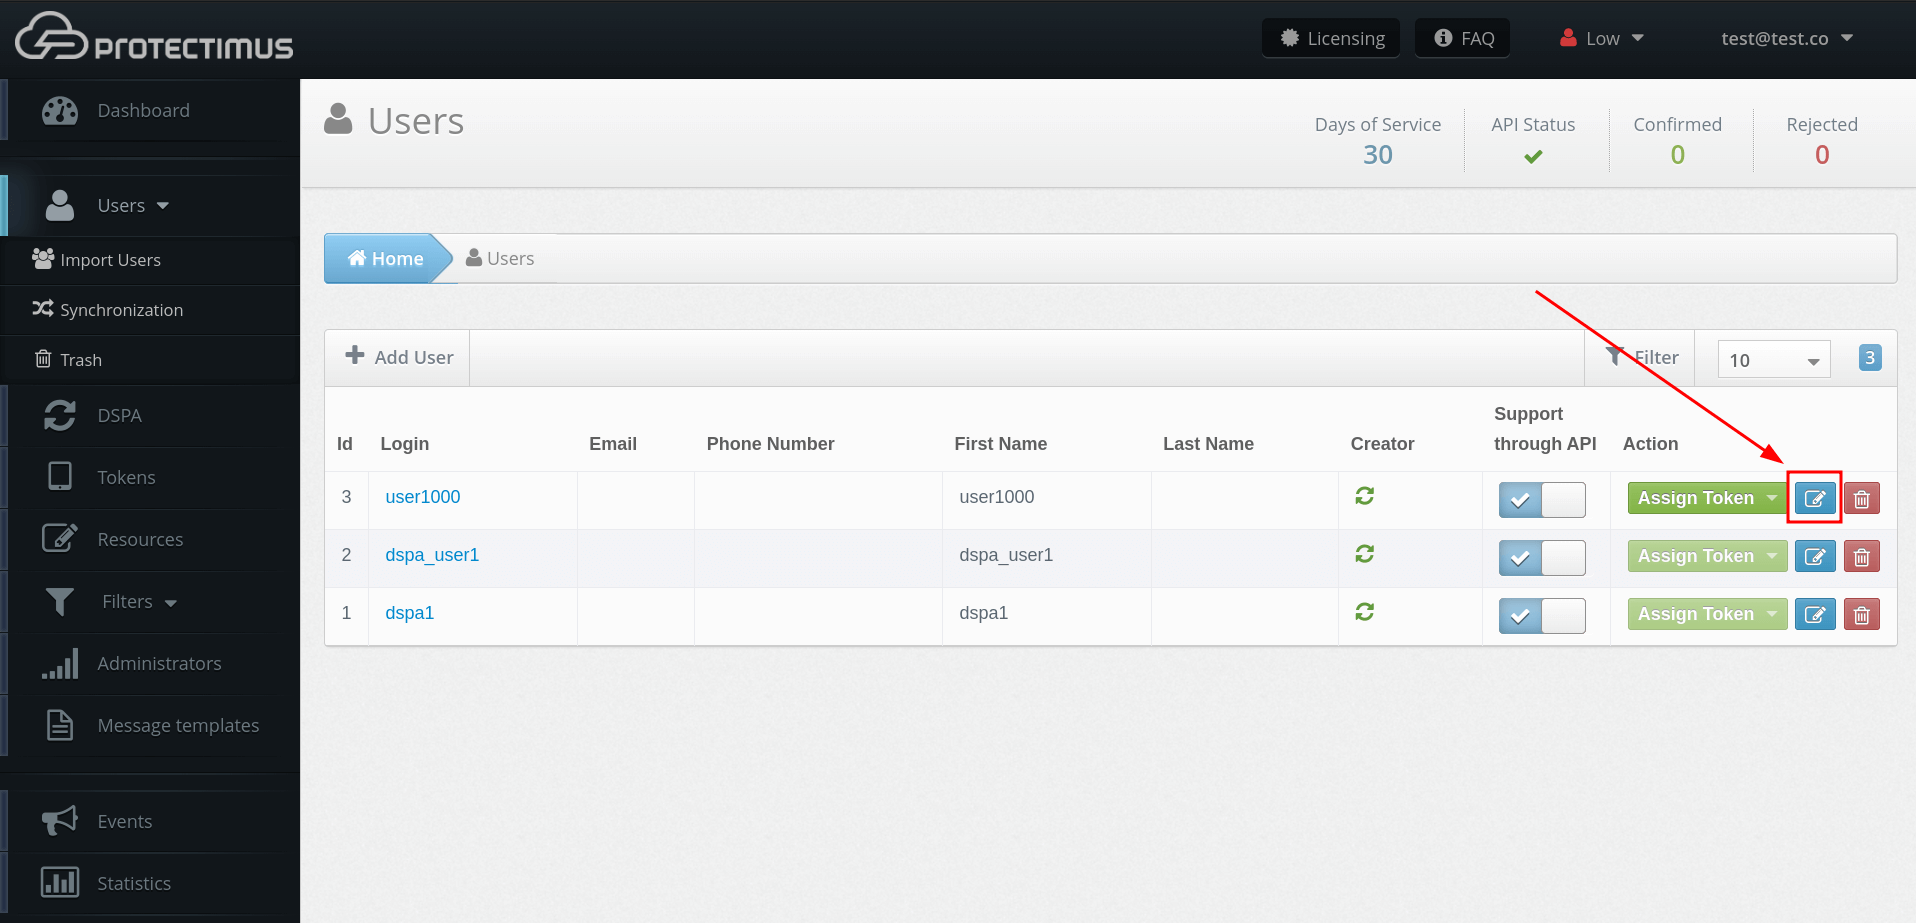
- Add Users manually.
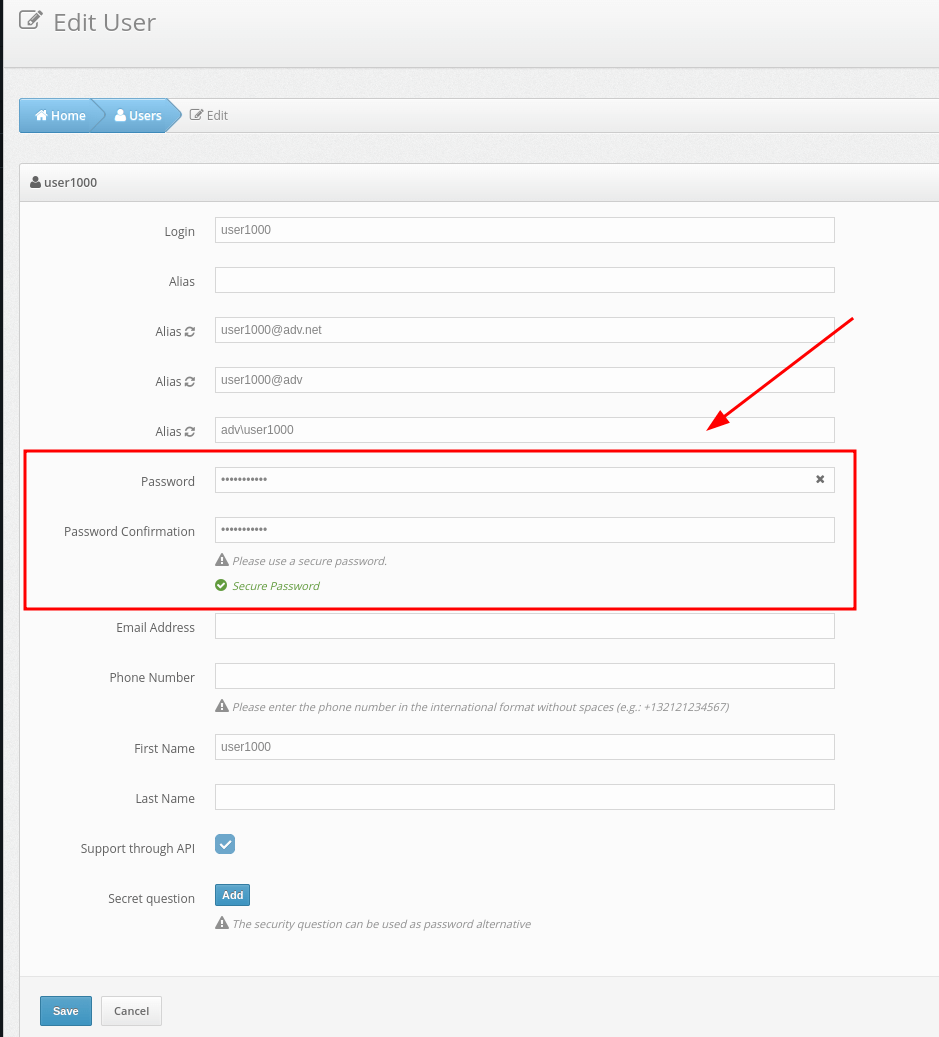
ATTENTION! The user login in the Protectimus service must match the Windows username. Before creating a user, make sure that your Windows username contains only Latin characters, numbers and the following symbols: _-∽!#.$.. Spaces and any other symbols are not allowed.
When you add 2-factor authentication to your local user account in Windows, your user’s login in Protectimus service must be identical to your username in Windows. For example, if your Windows username is John-Doe, then in the Protectimus service, you need to add a user with the John-Doe login.
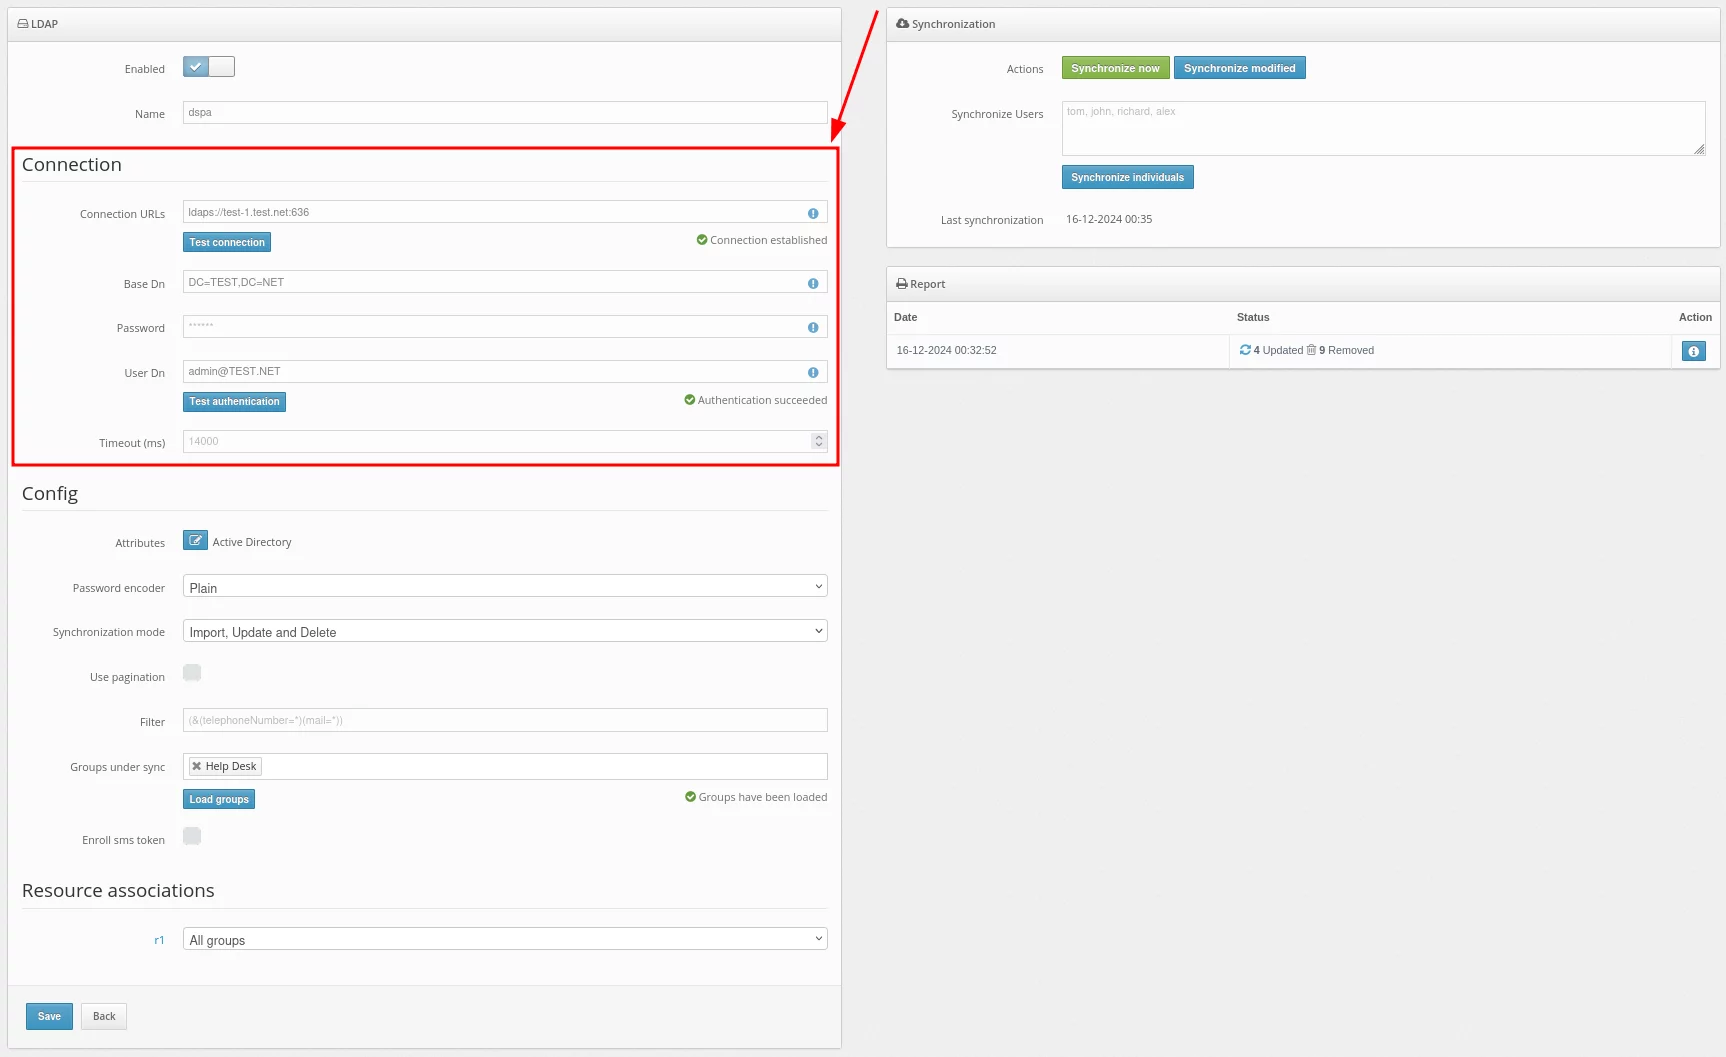
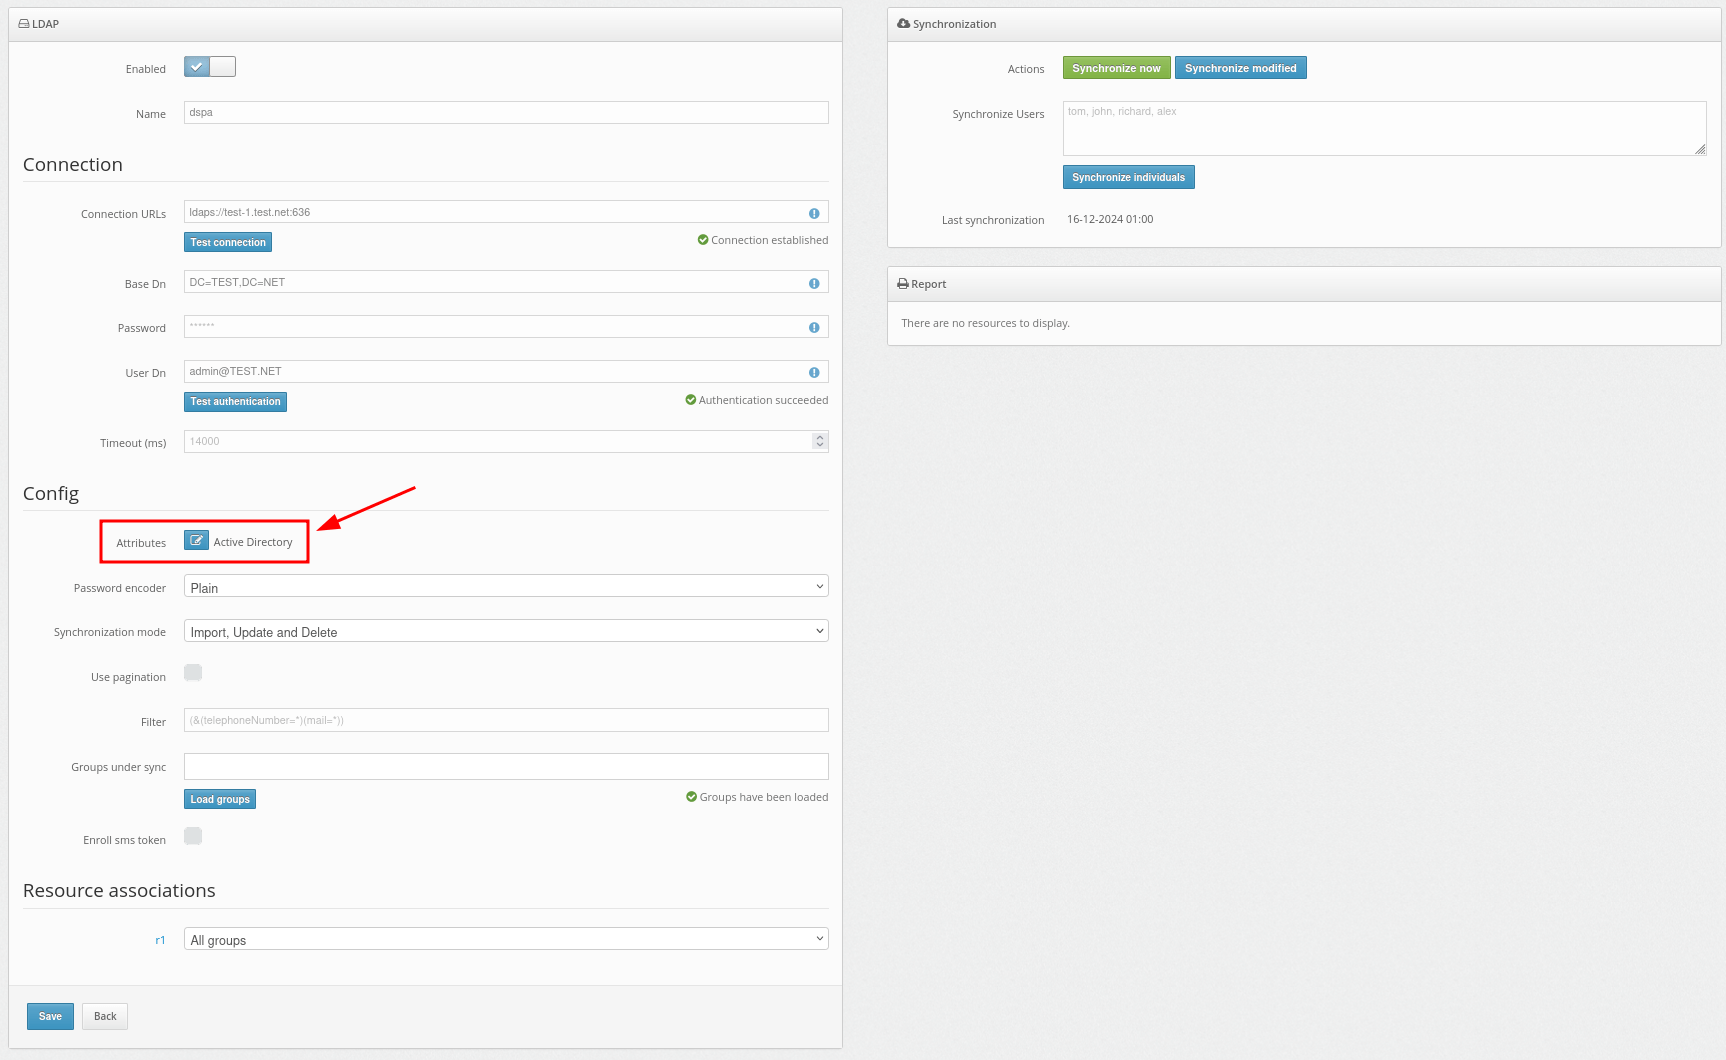
When you add users from Active Directory your users’ logins in Protectimus service must have the form login@domain, where login is the username in Active Directory, and domain is your corporate domain. For example, if the username in Active Directory is John-Doe and the corporate domain is google.com, then in the Protectimus service, you need to add a user with the John-Doe@google login.- Add Tokens manually.
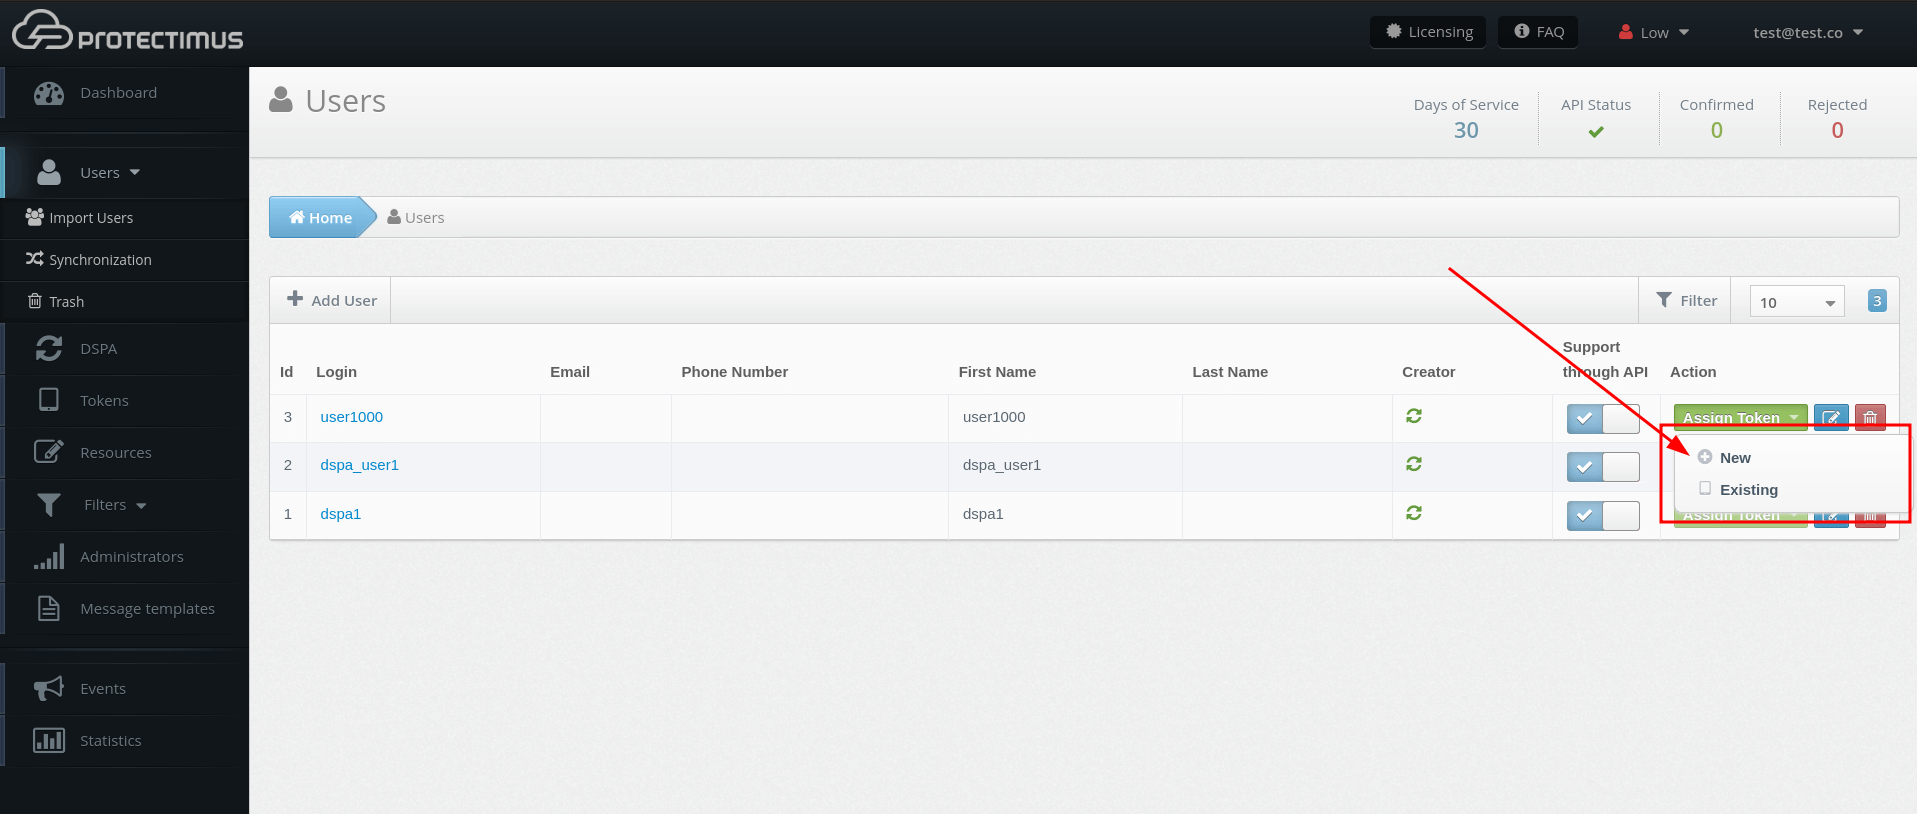
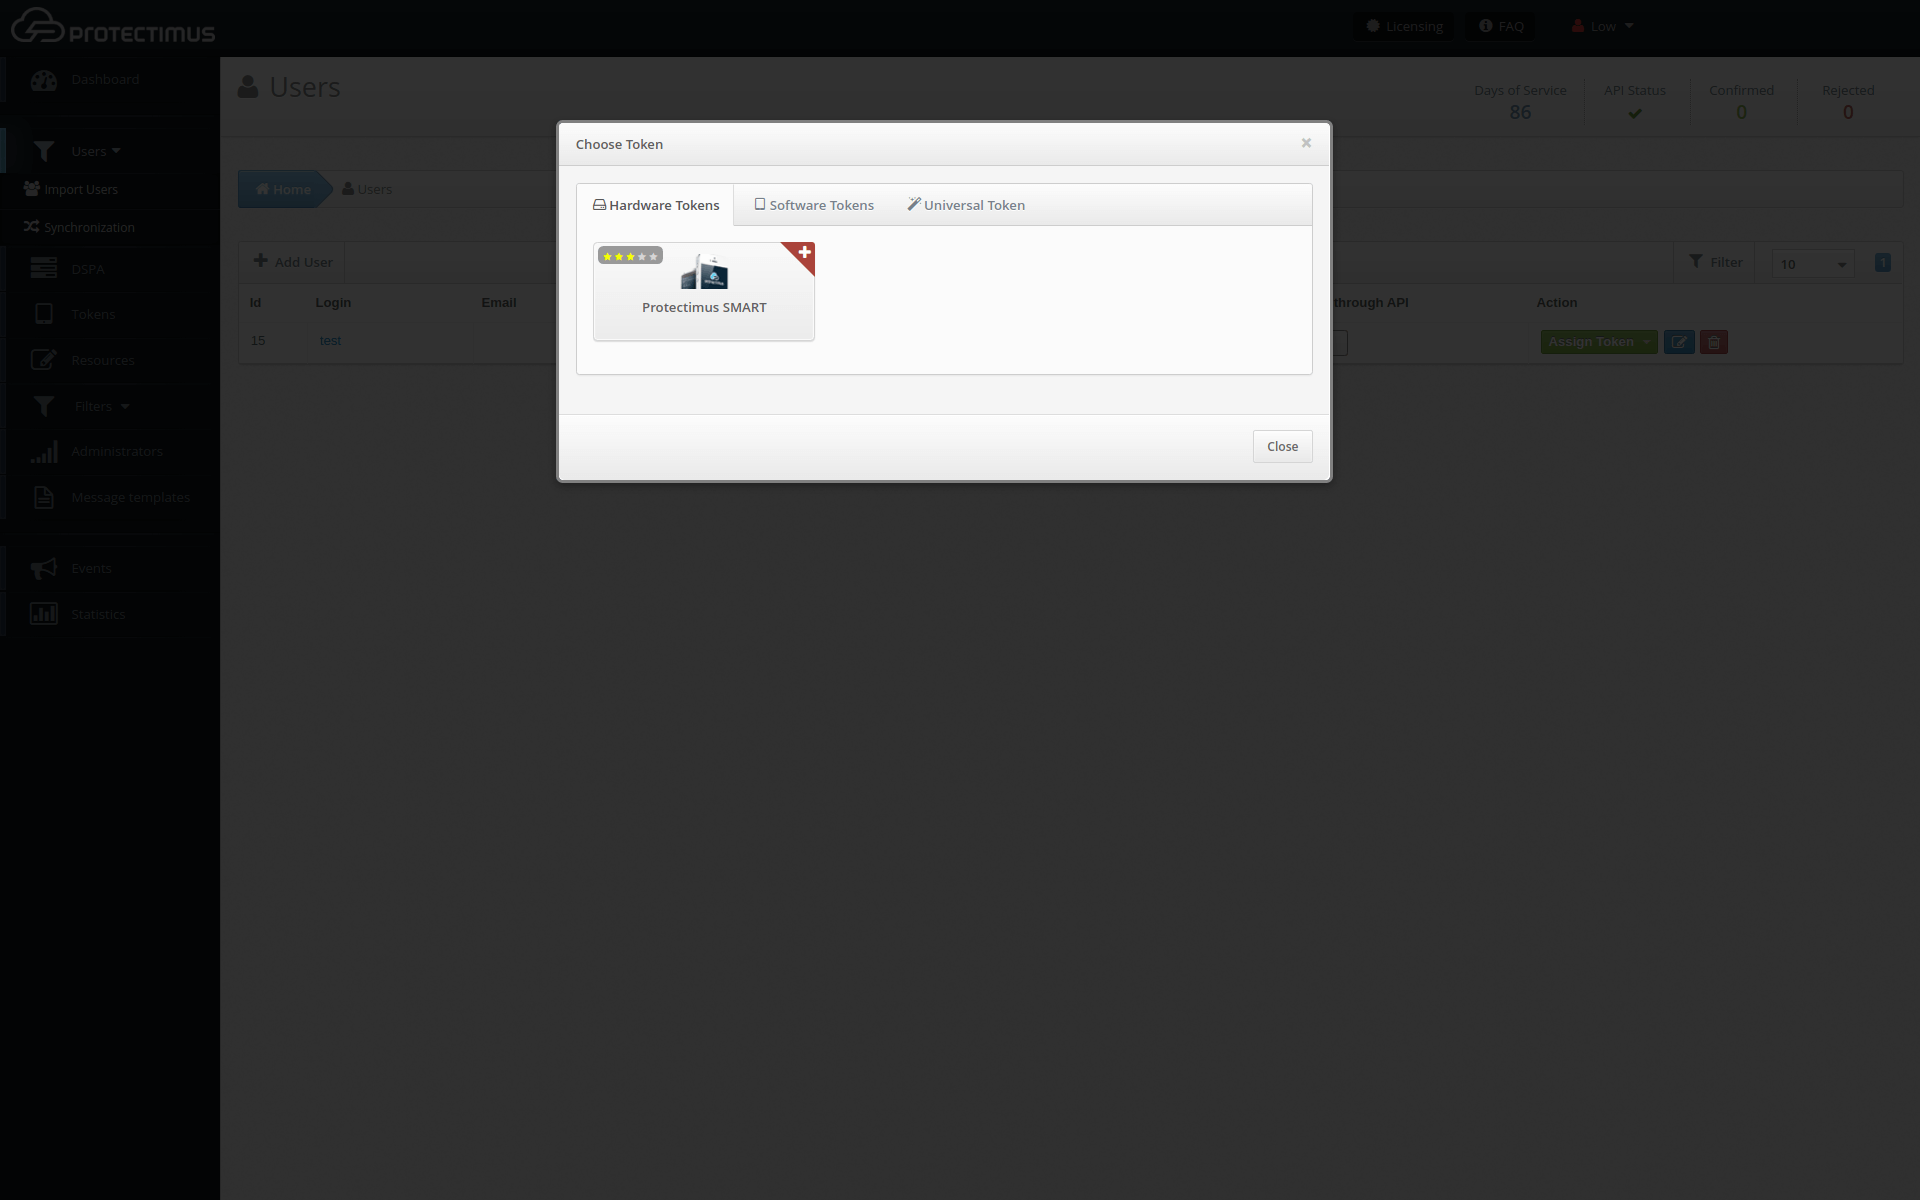
- Assign Tokens to Users.
- Assign Tokens with Users to a Resource.
4. Install Protectimus Winlogon
4.1. Download the installer and follow the initial setup steps
- Download the Protectimus Winlogon installer here.
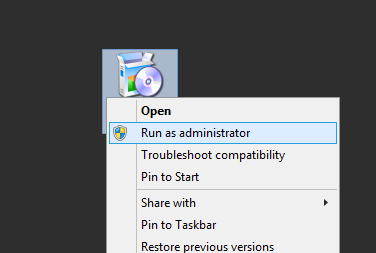
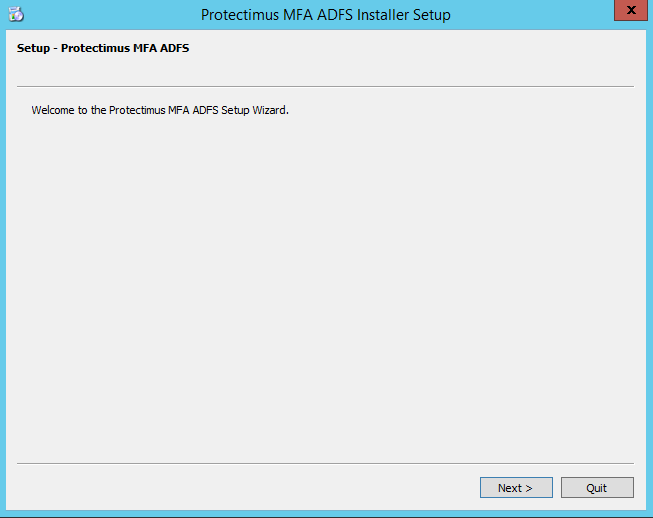
- Run the installer as administrator.
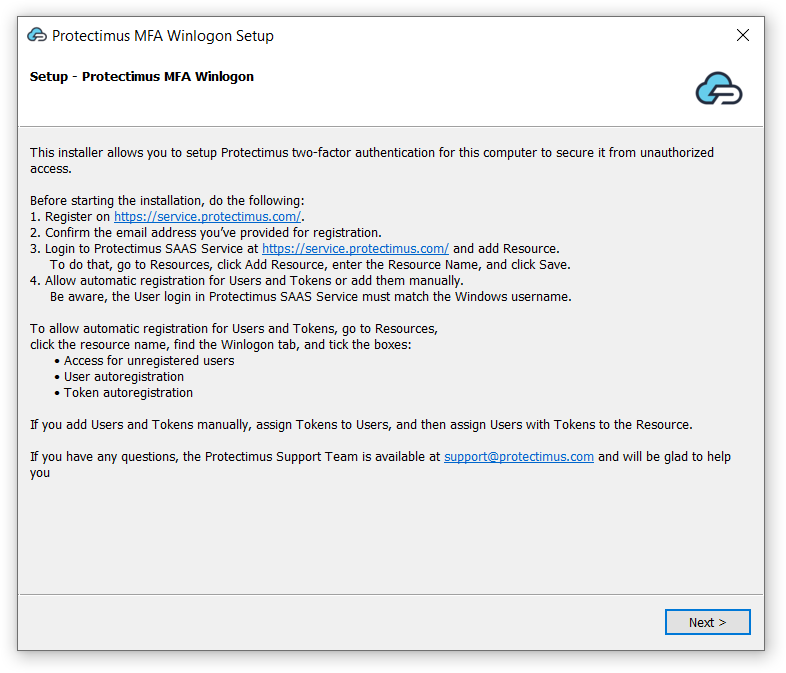
- You will see a welcome screen, click Next to continue.
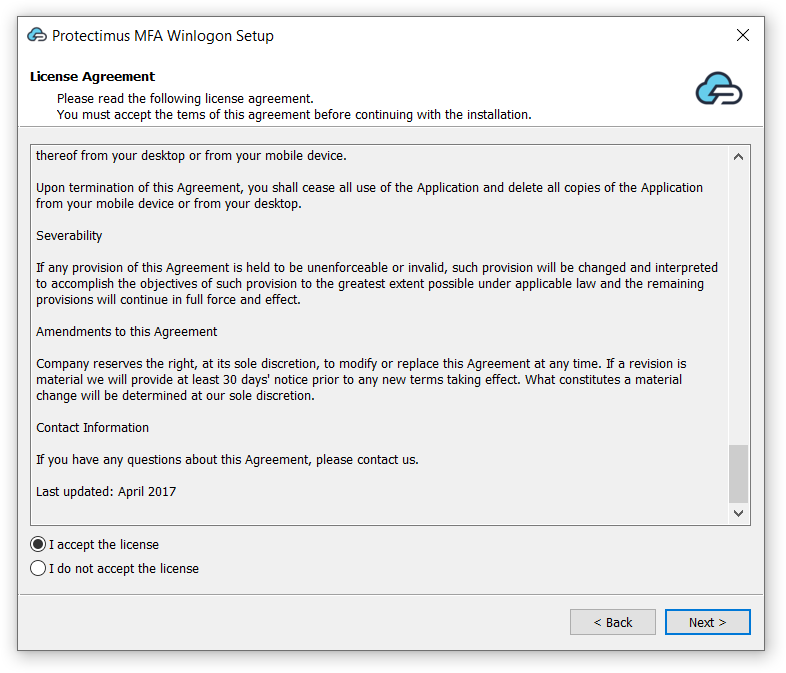
- Read the license agreement, tick I accept the license and click Next to continue.
4.2. Enter API URL, Login, API Key, then choose resource ID
- Enter API URL, Login, and API Key and click LogIn.
These parameters stand for:- API URL – an address of the API endpoint. If you use SAAS Service API URL is https://api.protectimus.com/. In the case of the on-premise Platform, API URL is a server address, where the Platform is running (for example, https://localhost:8443).
- Login – the login of your account, the same as for signing in.
- API Key – you’ll find it in your profile. To access a profile, click the user’s login in the top right corner of the interface, and choose the “Profile” entry from the drop-down list.
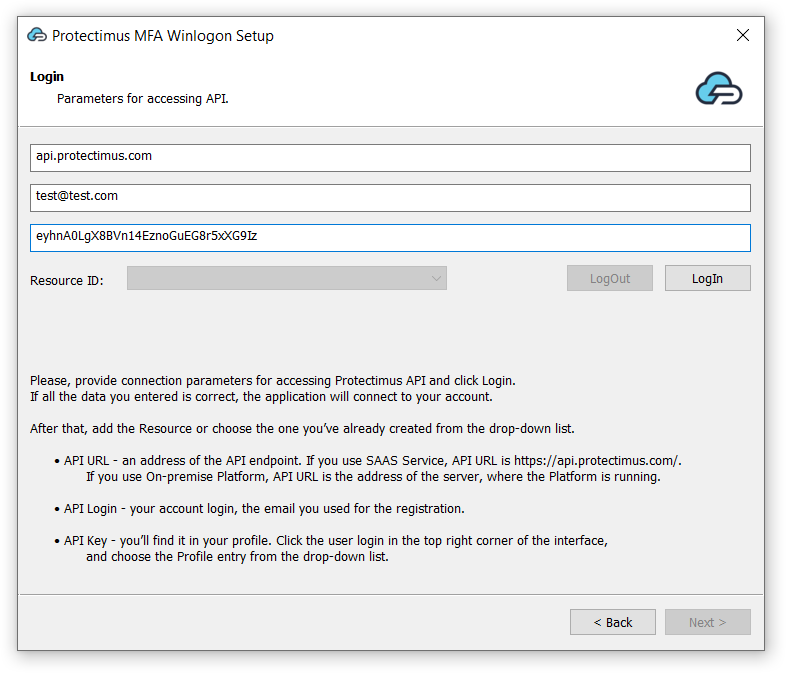
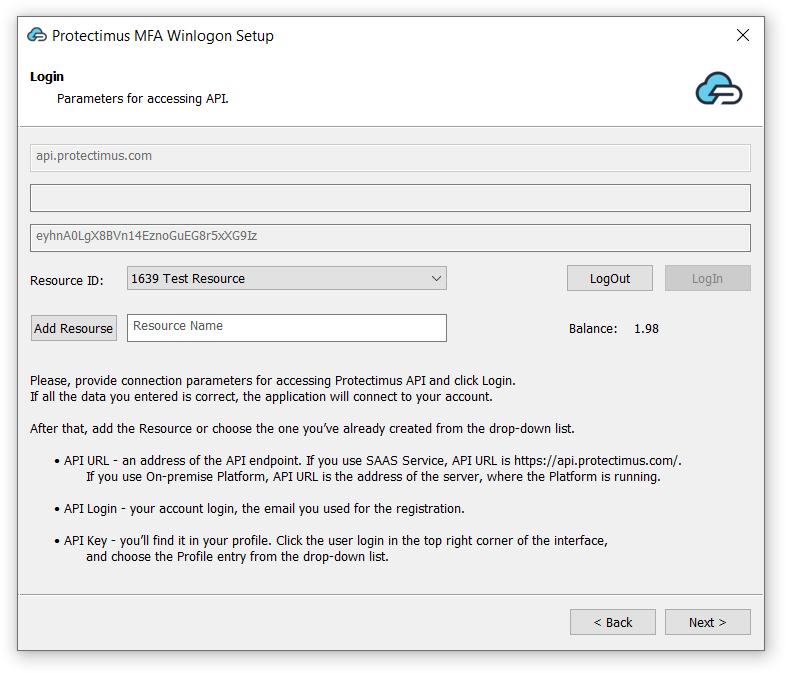
- Resource ID. Choose the Resource you’ve created before the installation. After that click Next to continue.
If you haven’t added the resource yet, add it now. Click Add Resource and enter any Resource Name you wish.
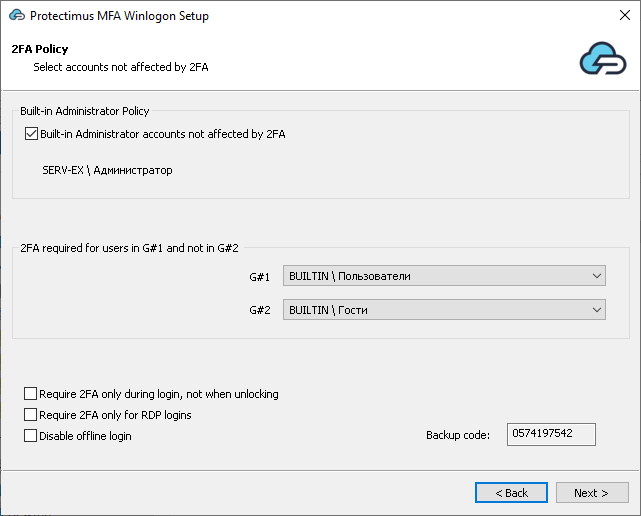
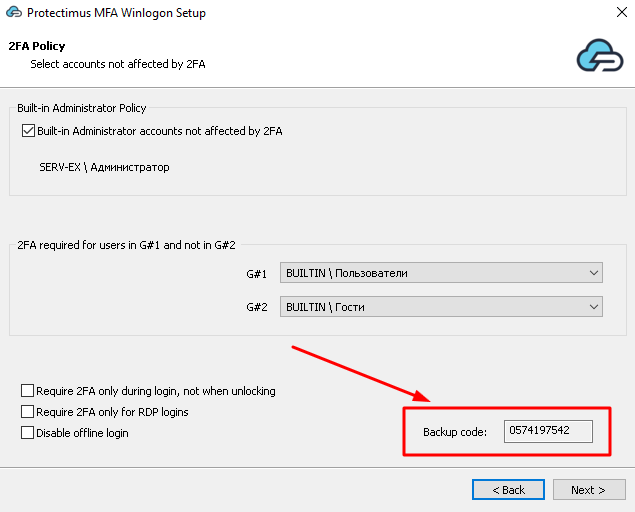
4.3. Configure 2FA policy and save the backup code
Configure 2FA policy and save the backup code, if necessary. By default, two-factor authentication will be applied to all accounts on this computer except the Built-in Administrator and guest accounts.- You can enable 2FA for the Built-in Administrator or for a group of users.
- You can configure additional settings like:
- Require 2FA during login, not when unlocking (available only for the domain installation);
- Require 2FA only for RDP logins;
- Disable offline login.
- You can also save the backup code. Your users will need this code to log into Windows accounts if there is no internet connection. The same backup code will work for all accounts on this computer.
ATTENTION! When the user logs in to the system with this backup code, a new code will be generated, which must be saved and used the next time the user will log into their account in offline mode. This backup code will also work for all accounts on this computer.
4.4. Choose domain installation options
If it is NOT a domain controller, just click Install.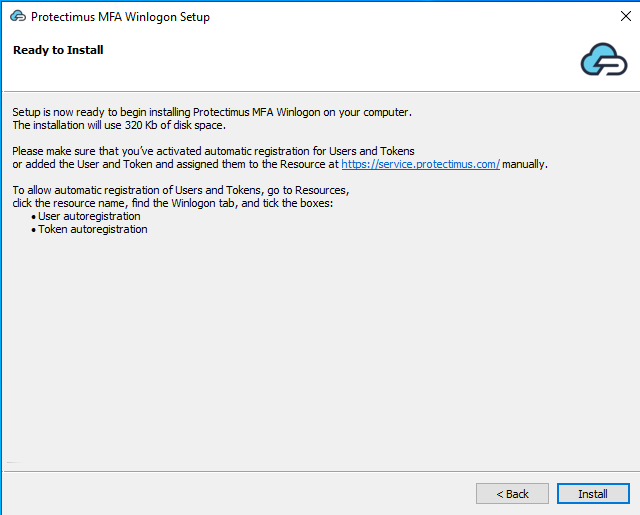
If you install the Protectimus Winlogon & RDP 2FA component on the domain controller, at this stage, you will see two options:
- Create a GPO for installation in the domain: this option creates a GPO for the automatic installation of Protectimus MFA software on all Windows machines in the domain
- Perform remote installation in the domain: this option opens an installation window to install the component directly on any PC in the domain.
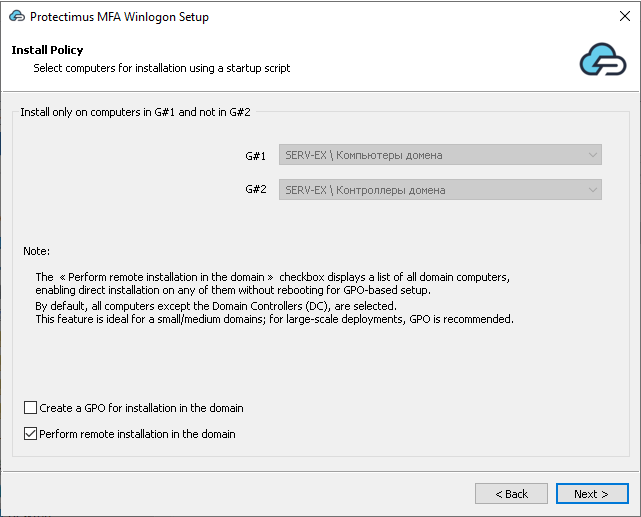
4.4.1. Create a GPO for installation in the domain
If you choose Create a GPO for installation in the domain, a GPO will contain a script for automatic installation when the computer starts.In dropdown menus, you can select the computers on which the component will be installed via Group Policy Objects (GPO), similar to the logic used with groups on in the previous step. If the checkbox “Create GPO for install in domain” is not selected, the dropdown menus will be disabled.
ATTENTION!
If you decide to uninstall the Protectimus Winlogon & RDP component on the domain controller, you will be suggested to create a GPO for the automatic uninstalling of this software on all other machines in the domain.
When you create GPO to uninstall Protectimus Winlogon & RDP on all the machines in your domain, delete this GPO manually when you finish uninstalling the software.
If you don’t delete the uninstall GPO manually, it can lead to some troubles when you install the Protectimus Winlogon & RDP component again. In this case, the software may not be installed/removed automatically on Windows machines in the domain.
4.4.2. Perform remote installation in the domain
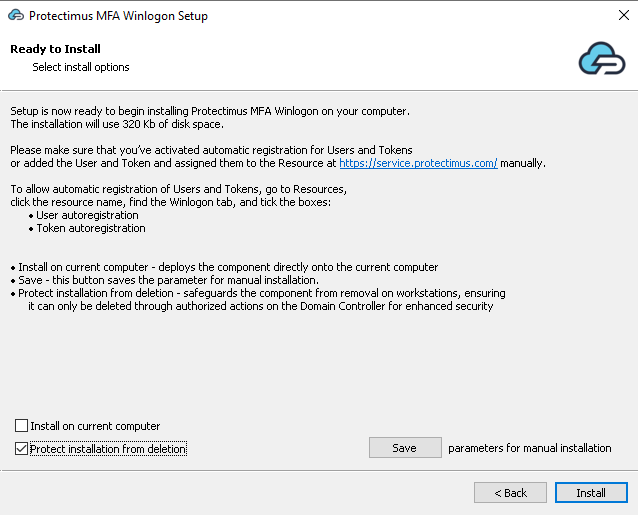
If you select the Perform remote installation in the domain option, the final step of the installation will display a screen where you can select computers for remote installation. From there, you can install the component directly on any selected machine in the domain. This option is useful for avoiding a computer restart, which is required when deploying via GPO.4.5. Choose the domain controller installation option
If you install the Protectimus Winlogon & RDP 2FA component on the domain controller, you will have two options. Choose the one that best suits your needs:- Install on current computer: Selecting this option deploys the component directly onto the current computer. For example, if the installation is on a domain controller and we have specified on the “Install Policy” screen that the component should not be installed on the domain controller, selecting this checkbox will install it on the current computer, i.e., the domain controller.
- Protect installation from deletion: Enabling this option safeguards the component from removal on workstations, ensuring that it can only be deleted through authorized actions on the Domain Controller, thus enhancing security. This option is enabled by default.
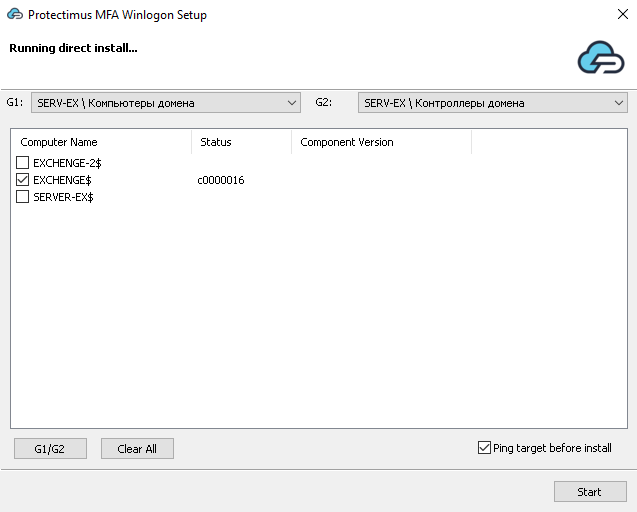
4.6. Select computers for remote installation
If you selected the Perform remote installation in the domain option in step 4.4, a screen will appear with a list of all computers in the domain, allowing you to install the component directly on any of them.By default, all computers except the Domain Controller (DC) are selected. The installation process for each computer takes typically 1-2 seconds. We recommend using this feature for installing the component on a few computers, rather than a large number. For installations on a large scale, it’s better to use GPO.
To check the status of a computer, hover over its name, and a tooltip with a description will appear.
Component Version column displays the version if the component is installed.
G1/G2 button selects computers according to the settings on the Install Policy screen (Step 8).
Clear All button clears all checkboxes.
And Ping target before install checkbox enables the sending of an ICMP request (ping) to the selected machine before the installation itself.
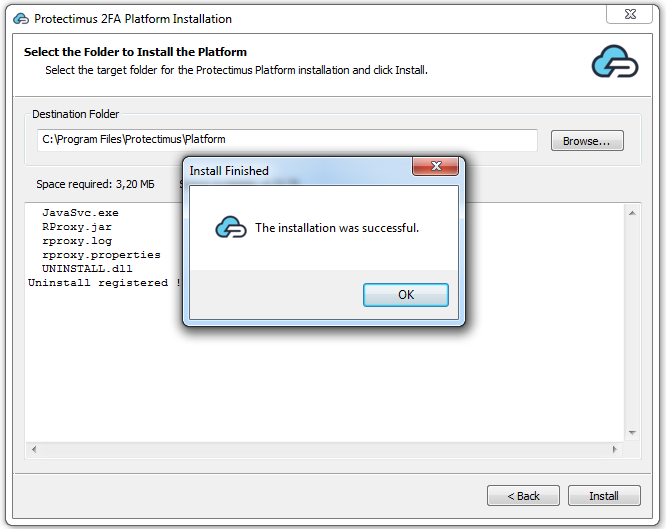
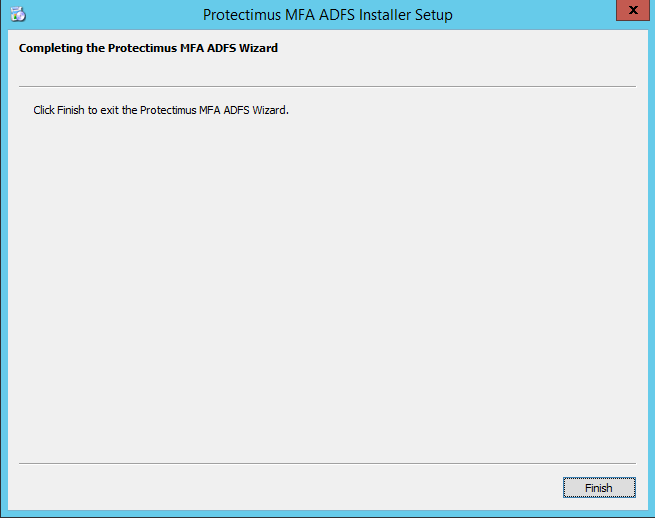
4.7. Finish the installation
After the installation is completed, click OK. The next time you start the computer, the two-factor authentication will be on.
5. How to Enable Access Over RDP
PLEASE NOTE! Until you do the following, access to the computer via RDP will be denied.
- Go to the Resources page, click on the name of your Resource and move to the Winlogon tab.
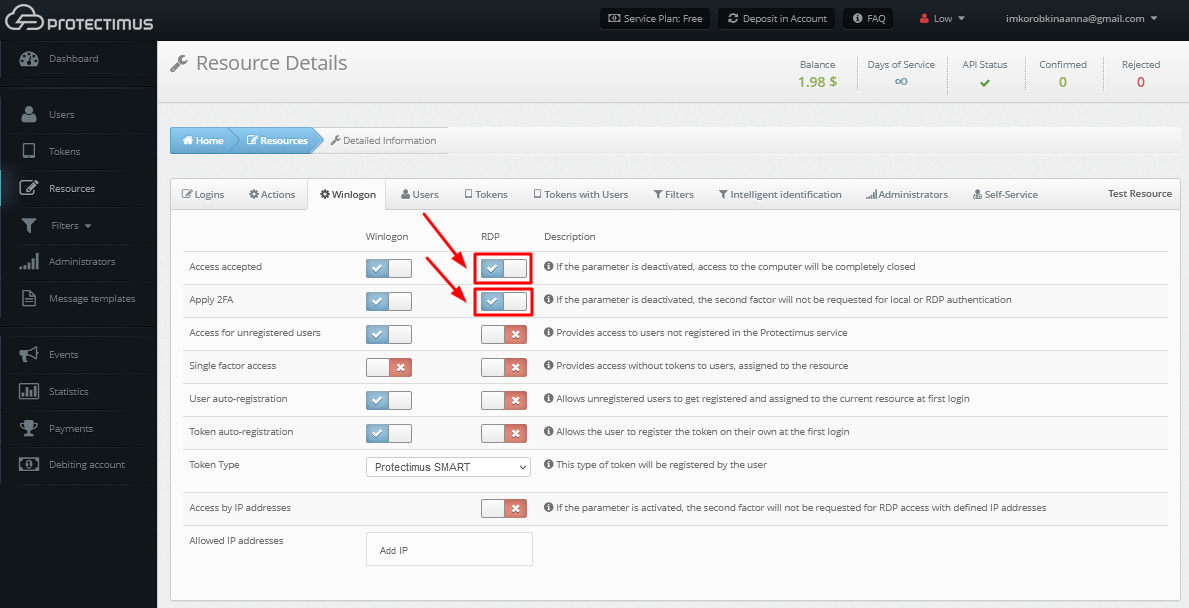
- Activate the parameter Access accepted for RDP. Activating this parameter allows access to the computer via RDP without two-factor authentication.
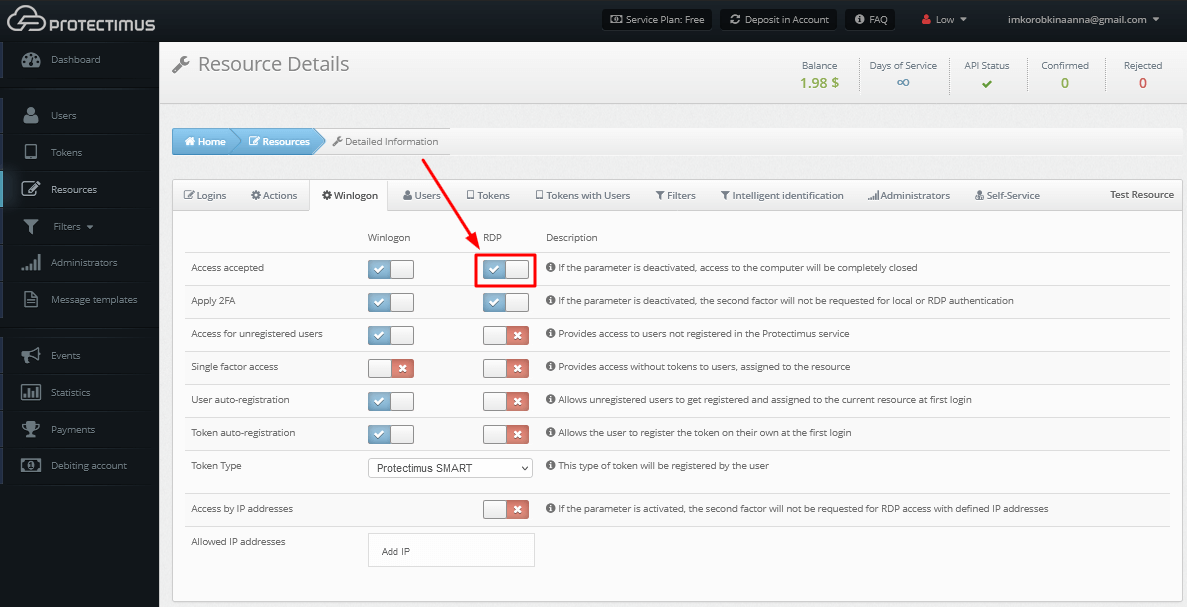
- To enable two-factor authentication when requesting access via RDP, additionally, activate the Apply 2FA parameter for RDP.
6. Backup codes for offline access
For the Protectimus two-factor authentication system to work normally, the computer must be connected to the Internet.For emergencies, when the user is unable to connect to the Internet, it is possible to log into the account using a backup code instead of a one-time password.
The first backup code is issued when installing the component. Please, note that this code is valid for all accounts registered on this computer. It can be used one time, then a new code will be generated and shown to the user. A new backup code will also be valid for all user accounts registered on this computer.
ATTENTION! When the user logs in to the system with the backup code, a new code will be generated, which must be saved and used the next time the user will log into their account in offline mode. This backup code will also work for all accounts on this computer.
6.1. How to Reissue a Backup Code
If the users lose the backup code for some reason, they can release a new backup code when they are online. This requires a special utility software, which your chief Protectimus account administrator should request at [email protected].To use the utility software:
- Sign in to your Windows account.
- Download and run the utility software.
- Press CTRL + ALT + DEL
- Save your new backup code.
7. Logs and Errors
In case of some errors, you have several points to check what’s going on. First of all, you can check System’s logs on Windows (Event Viewer -> Windows Logs -> Application).The Protectimus On-Premise Platform logs could be found in the PLATFORM_DIR and TOMCAT_HOME/logs directories (for example C:\Windows\Temp\Protectimus.log).
Also, visit the Events page in the Protectimus Platform and you will see related information.
8. Uninstalling
If there is no access to your Windows user account, you can disable the Protectimus Winlogon app in Safe Mode.
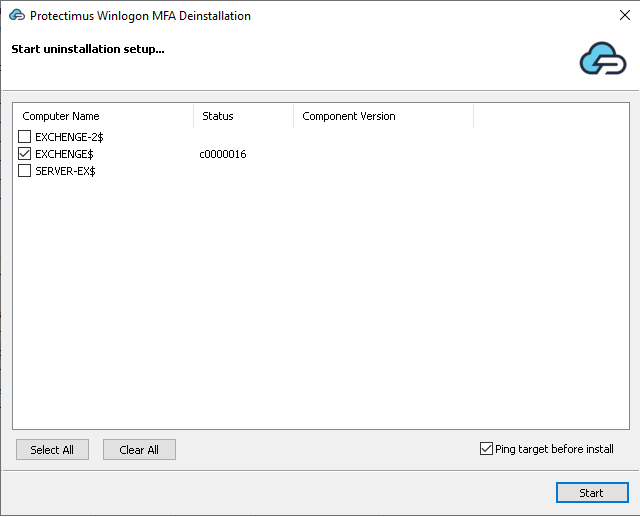
- Go to the Windows Uninstall or Change a Program menu, find the program Protectimus Winlogon and click Uninstall.
- Start uninstallation setup window will be opened for the domain installation. Use the same approach as the Perform remote installation in the domain option during the installation process to uninstall the component. This is an optional step, you can close the window to uninstall the component using GPO or only on the current machine.
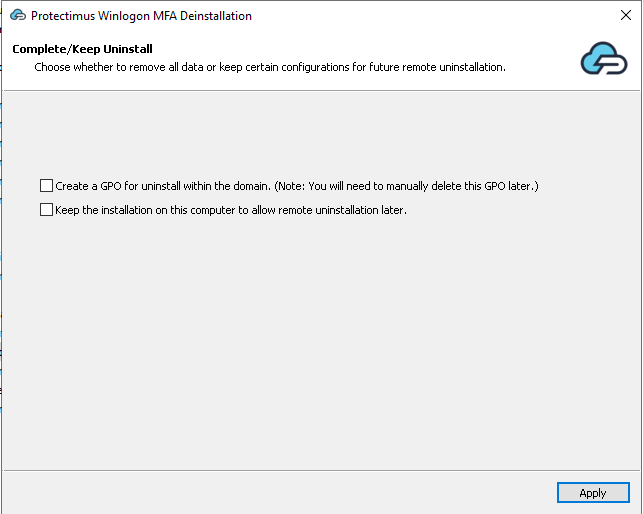
- After closing the previous window the Complete/Keep Uninstall window will be opened, where you have 2 options:
- The first checkbox will create a GPO for the automatic uninstalling of this software on all other machines in the domain.
- The second one will keep the component on the current computer for further uninstallation purposes.
ATTENTION!
When you create GPO to uninstall Protectimus Winlogon & RDP on all the machines in your domain, delete this GPO manually when you finish uninstalling the software.
If you don’t delete the uninstall GPO manually, it can lead to some troubles when you install the Protectimus Winlogon & RDP component again. In this case, the software may not be installed/removed automatically on Windows machines in the domain.


 To fix this error execute the next command in the PowerShell with administrative privileges: